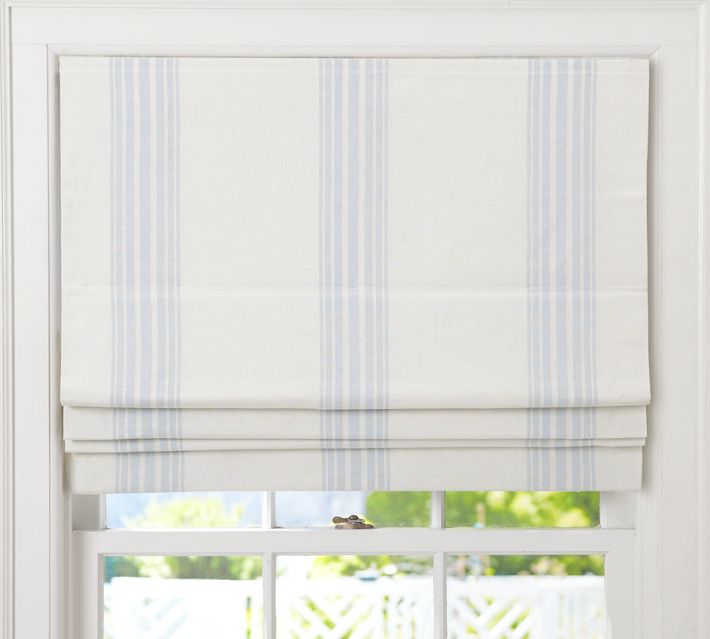
I’ve been eyeing these Roman shades at Pottery Barn for quite awhile, but at $250 apiece, eyeing is all I’ve been doing.
After scouring Pinterest for a DIY version, all I came up with were Roman shades people made from vinyl mini blinds, which just weren’t the same. We’ve had two old corduroy shades stored under our bed that the previous owner left in one of the bedrooms, and I realized I had just enough leftover fabric from making our bedroom curtains to recover them. How hard could it be, right?
Well, each one took me about 4 hours to finish, and I basically ended up making new shades from scratch, but at least having the old ones gave me all the hardware I needed. Best of all, at $0, they were a $500 savings from the Pottery Barn version. I realize most people don’t have extra Roman blinds laying around, so I linked to Amazon listings for items I used, as reference.
Materials
- 5 Cord Lock-$8.85 on Amazon
- Shade ring
- Shade cord
- Needle and thread
- Screw eye hooks
- Staple gun and staples
- 1 x 1 piece of wood-cut the exact opening of your window frame
- Fabric-I used Premier Prints Isadella Coral from Fabric.com
- Drapery LIning
- wooden dowel, cut to the width of your window frame
This is what the underside of my original drape looked like:
Drapery liner makes the shades a little darker, and also protects the shade from being discolored by sunlight. The drapery lining should be cut to the exact width of the 1 x 1″ piece of the wood (which is cut to the exact width of the window frame opening), then cut the fabric two inches wider and longer. That leaves a 1″ overhang to either sew or use fusing web to attach to the liner. After the two pieces of fabric are adhered, the fabric cut for the shade should be the exact width of the window frame. This is what everything looks like when you get started: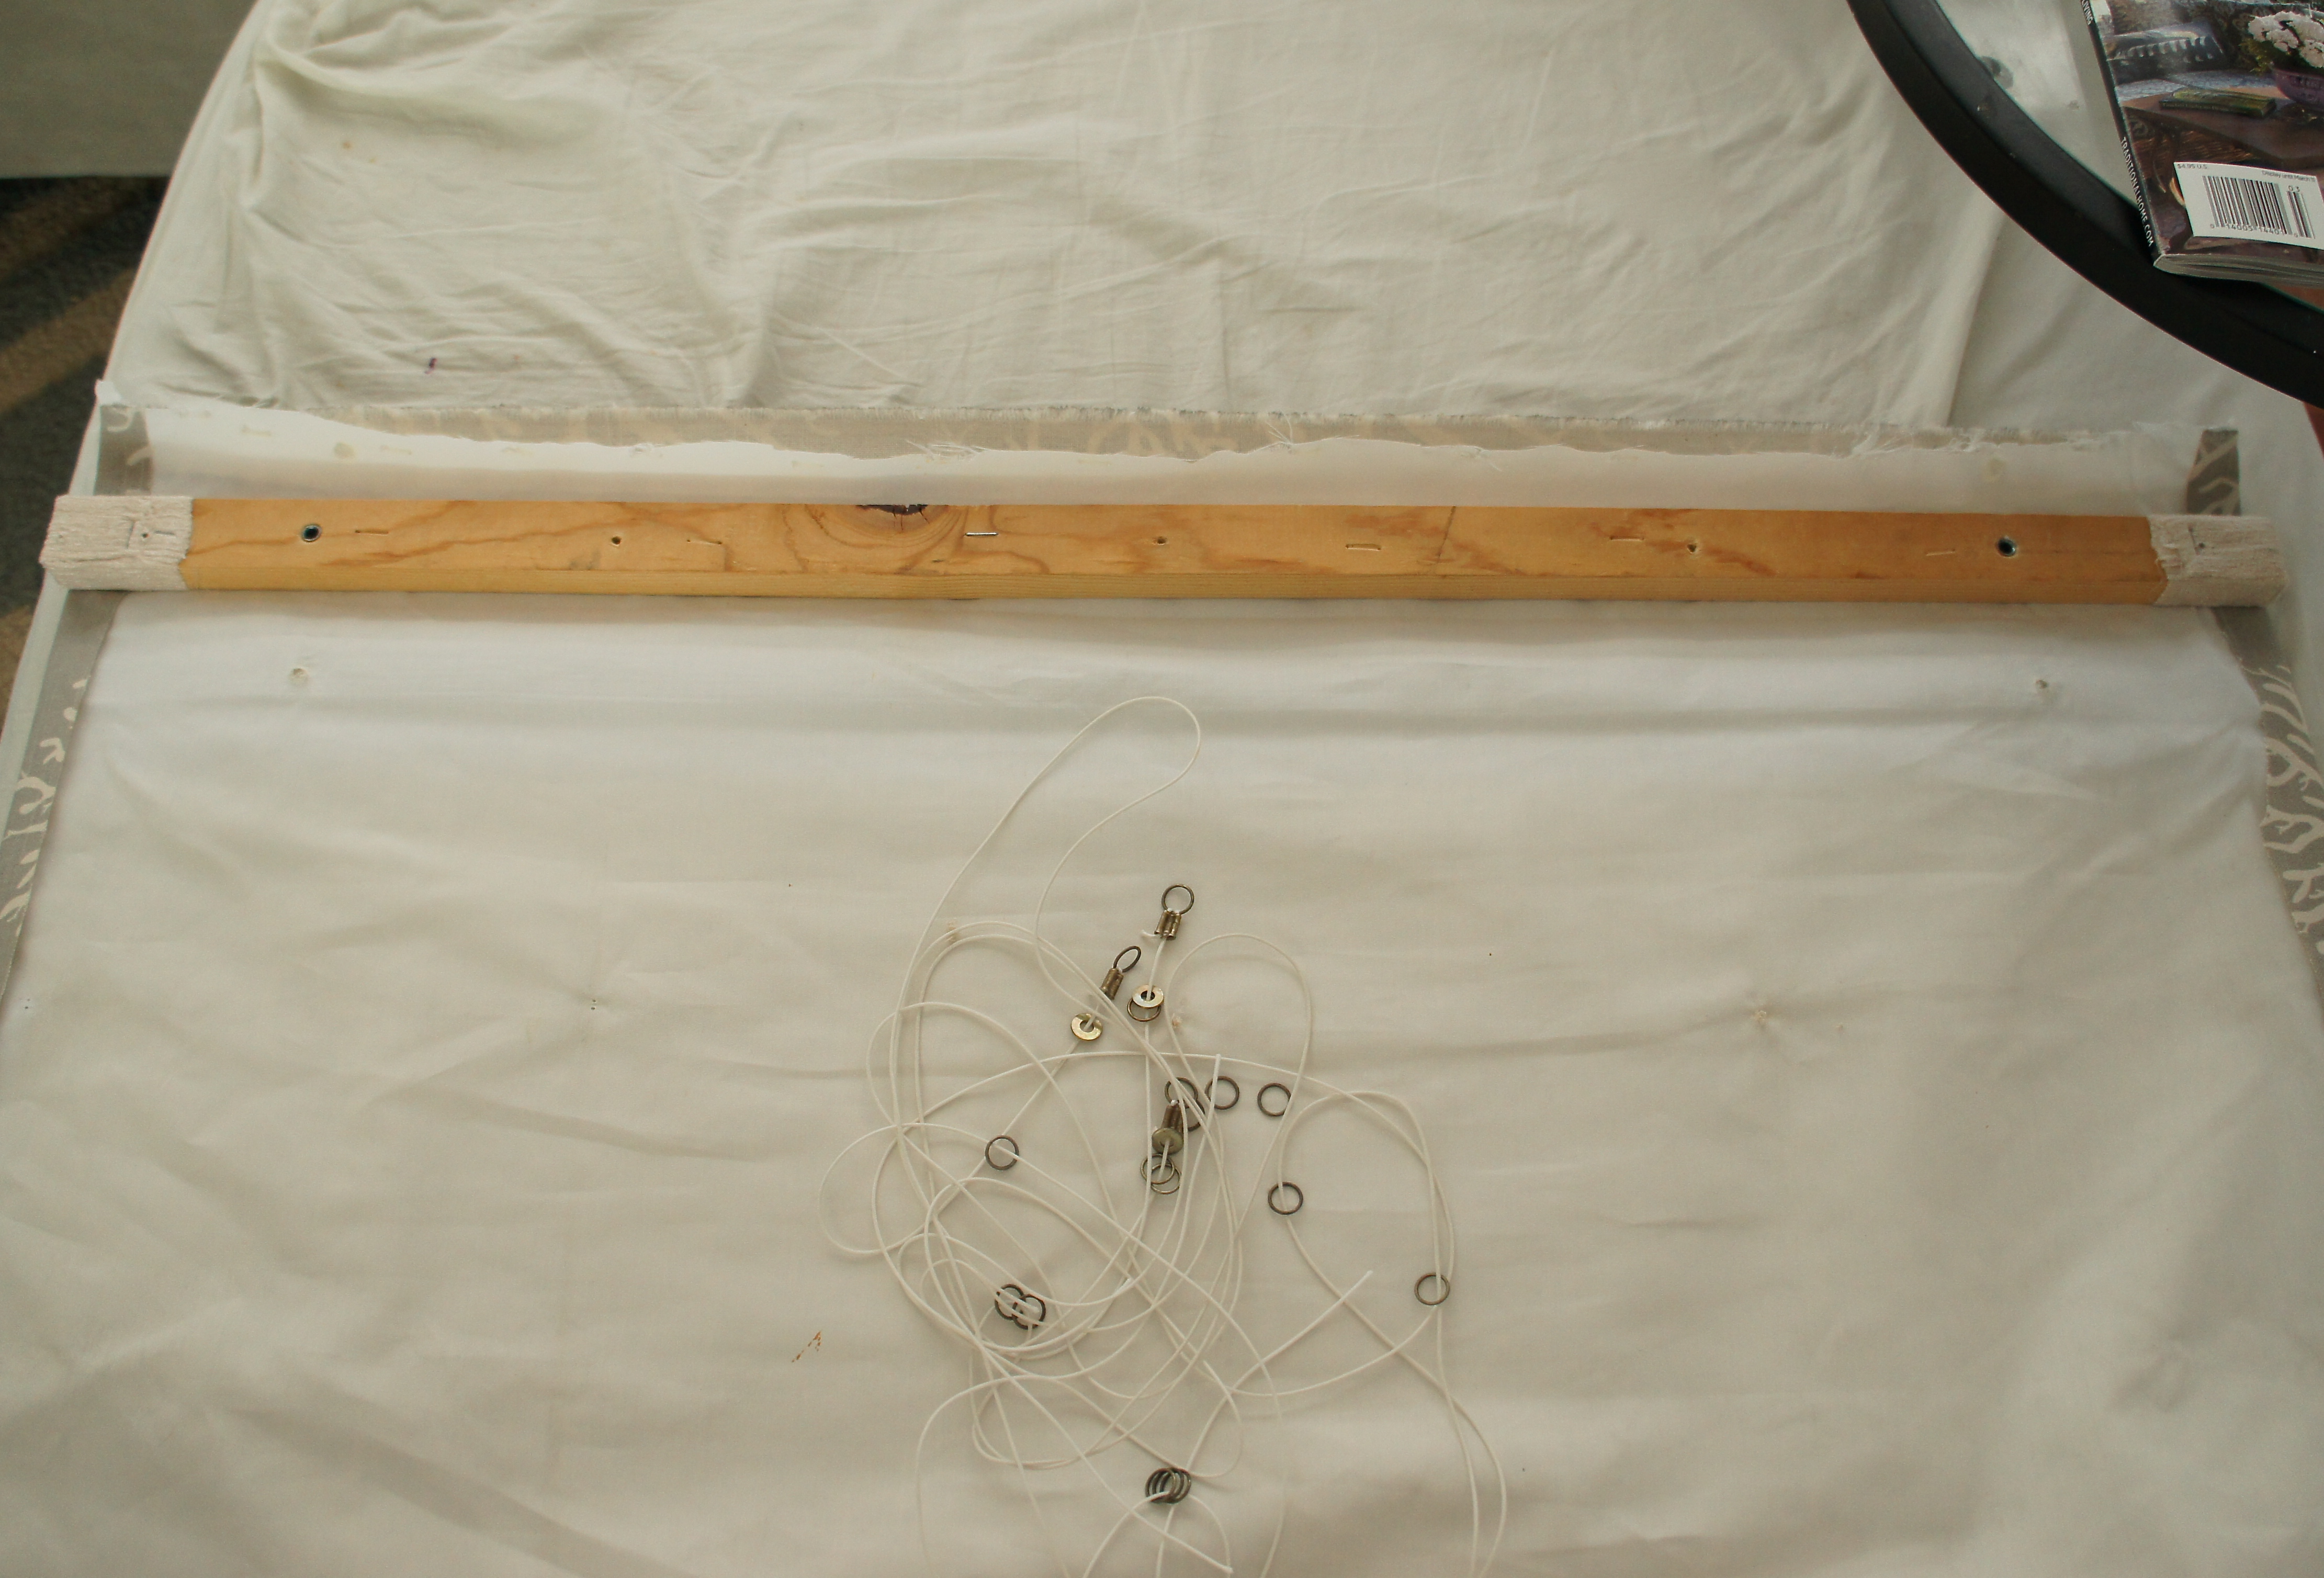
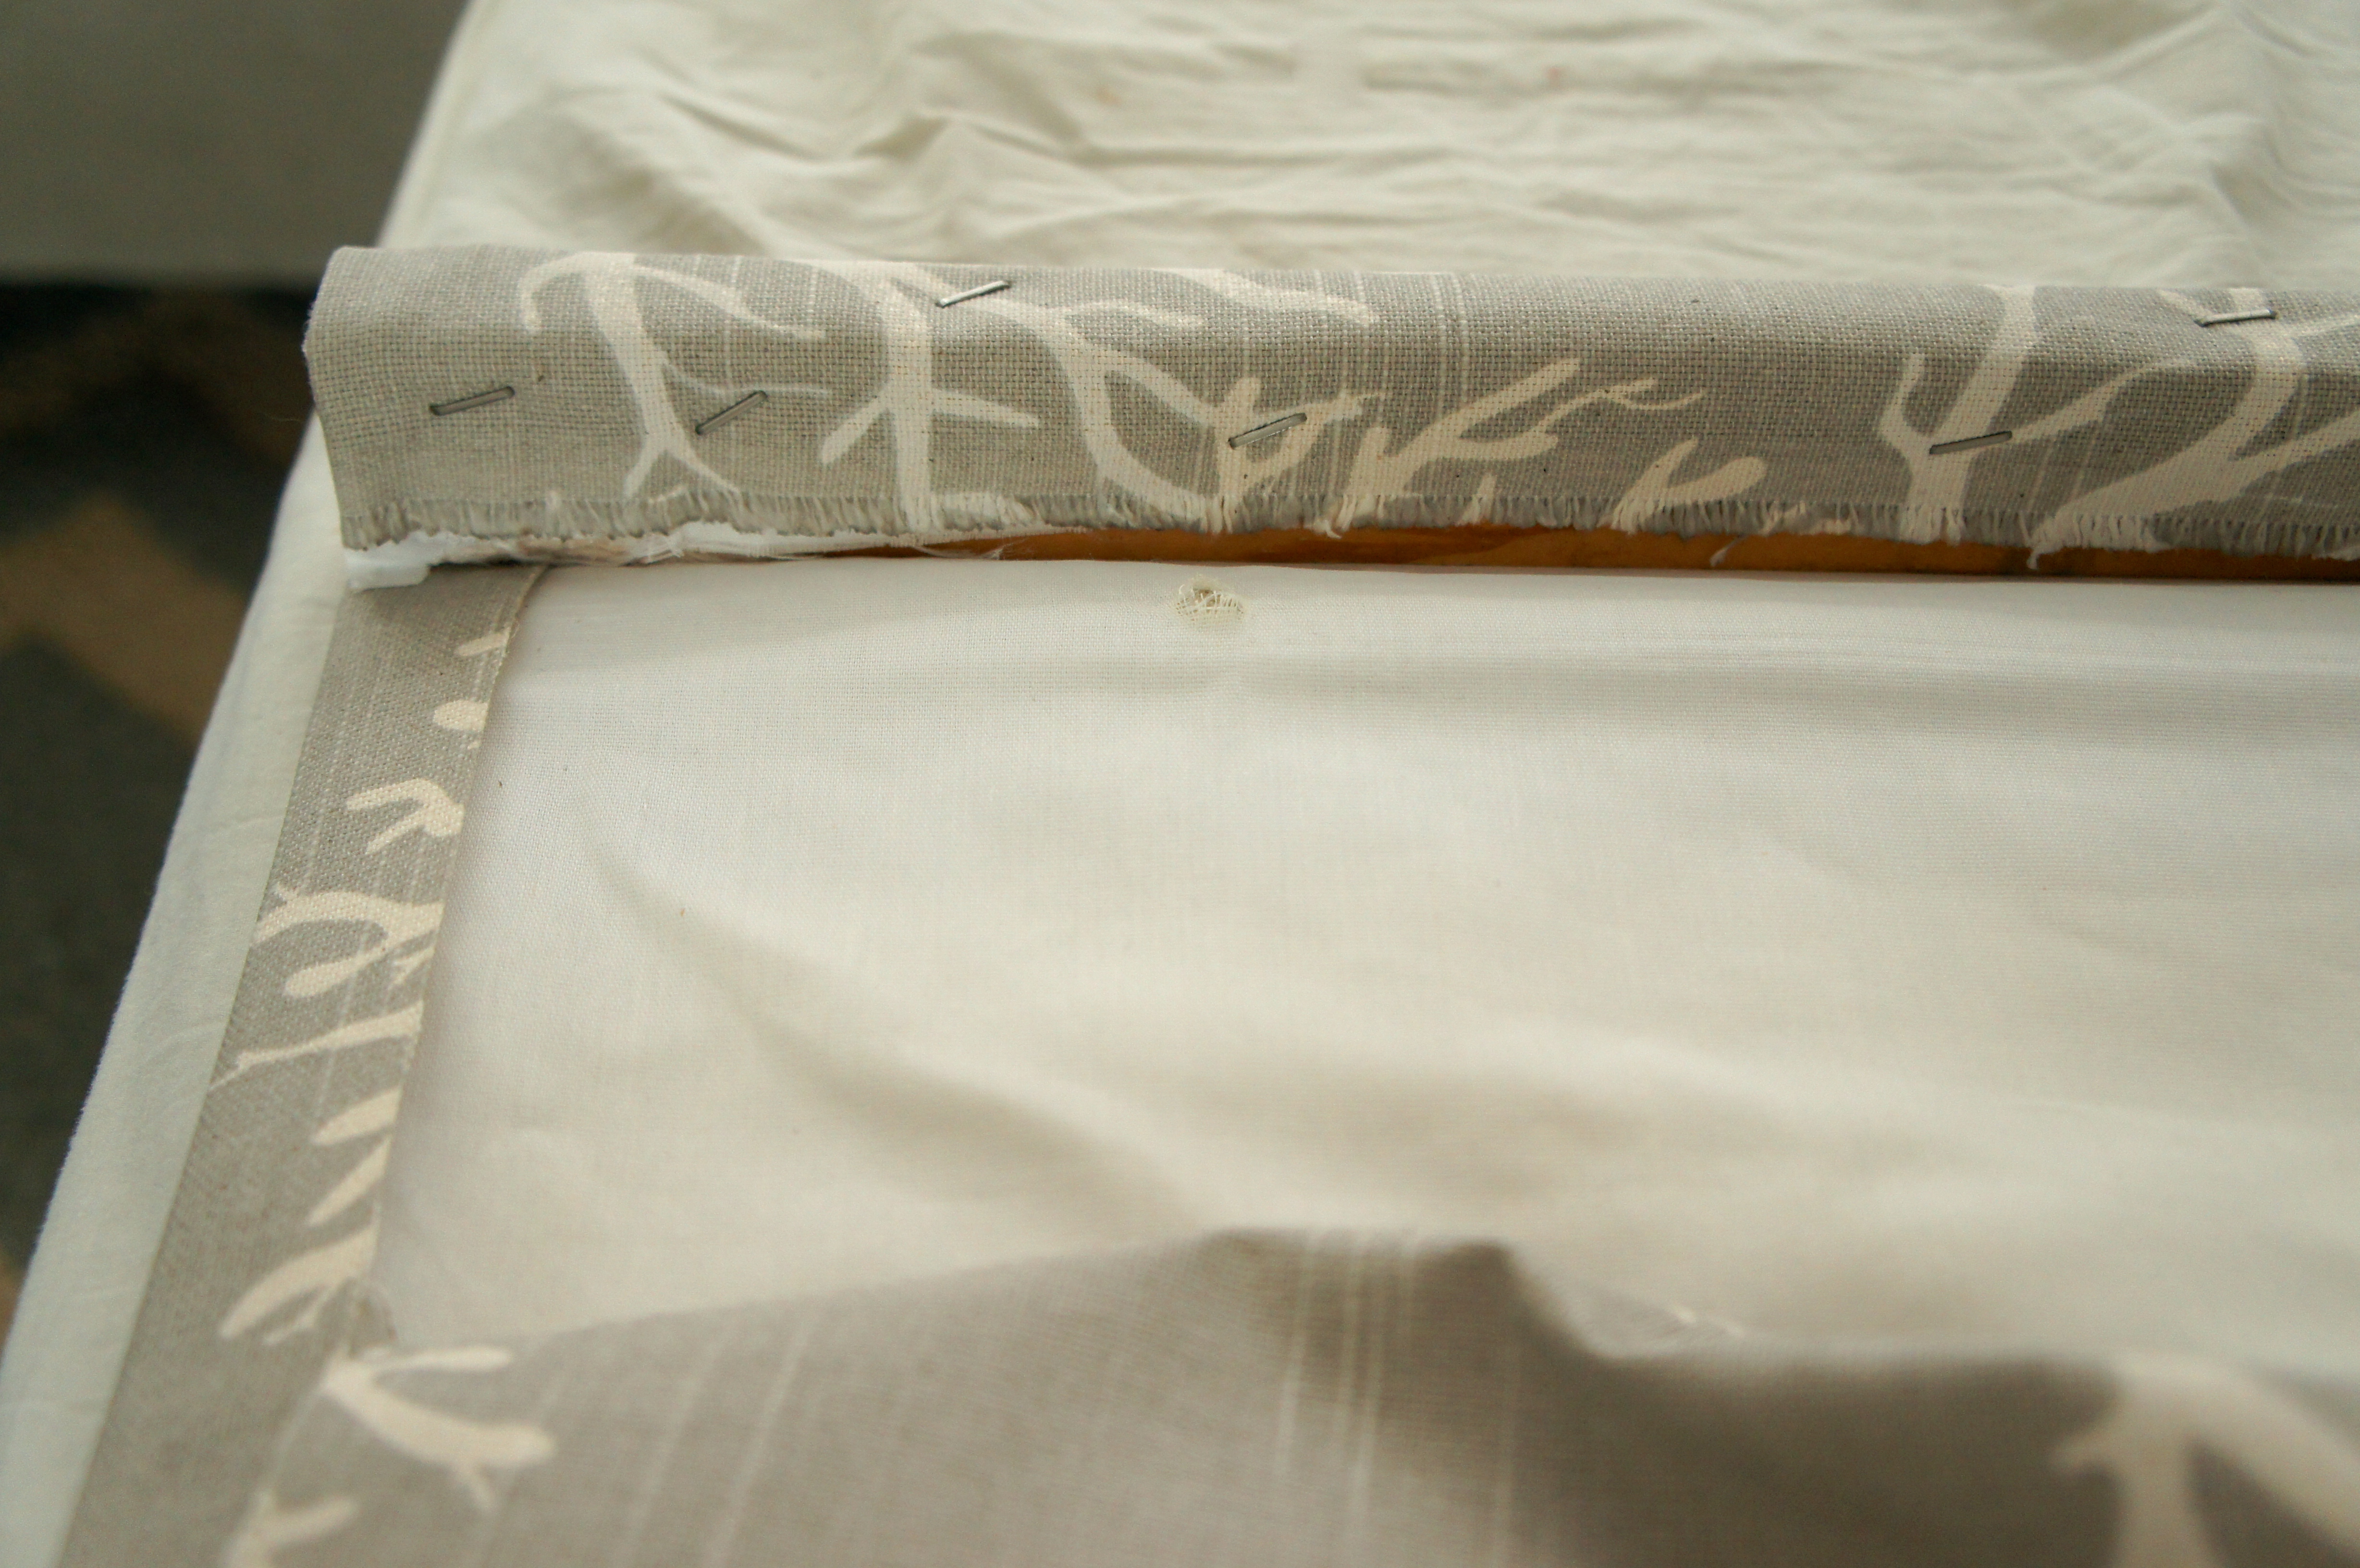
From the top of my shade, I rolled the fabric around the wood a couple times, pulling it tight, and stapled it on with a staple gun.
There will be five cords on the shade, so the four screw eyes need to be drilled into the wood, spaced evenly apart. The fifth cord doesn’t need a screw eye because the cord lock (which will be attached at the end) goes on the left side of the shade. Photos make everything a little clearer:
Then, going in rows, I attached my cord rings. The first row can be seen in the picture above. They go directly beneath the screw eyes, and each one will coordinate with a fold when the shade is drawn up. It’s really at your discretion how many rows you want to do, I think my shade had four. I attached them by sewing them onto the fabric with a needle and thread.
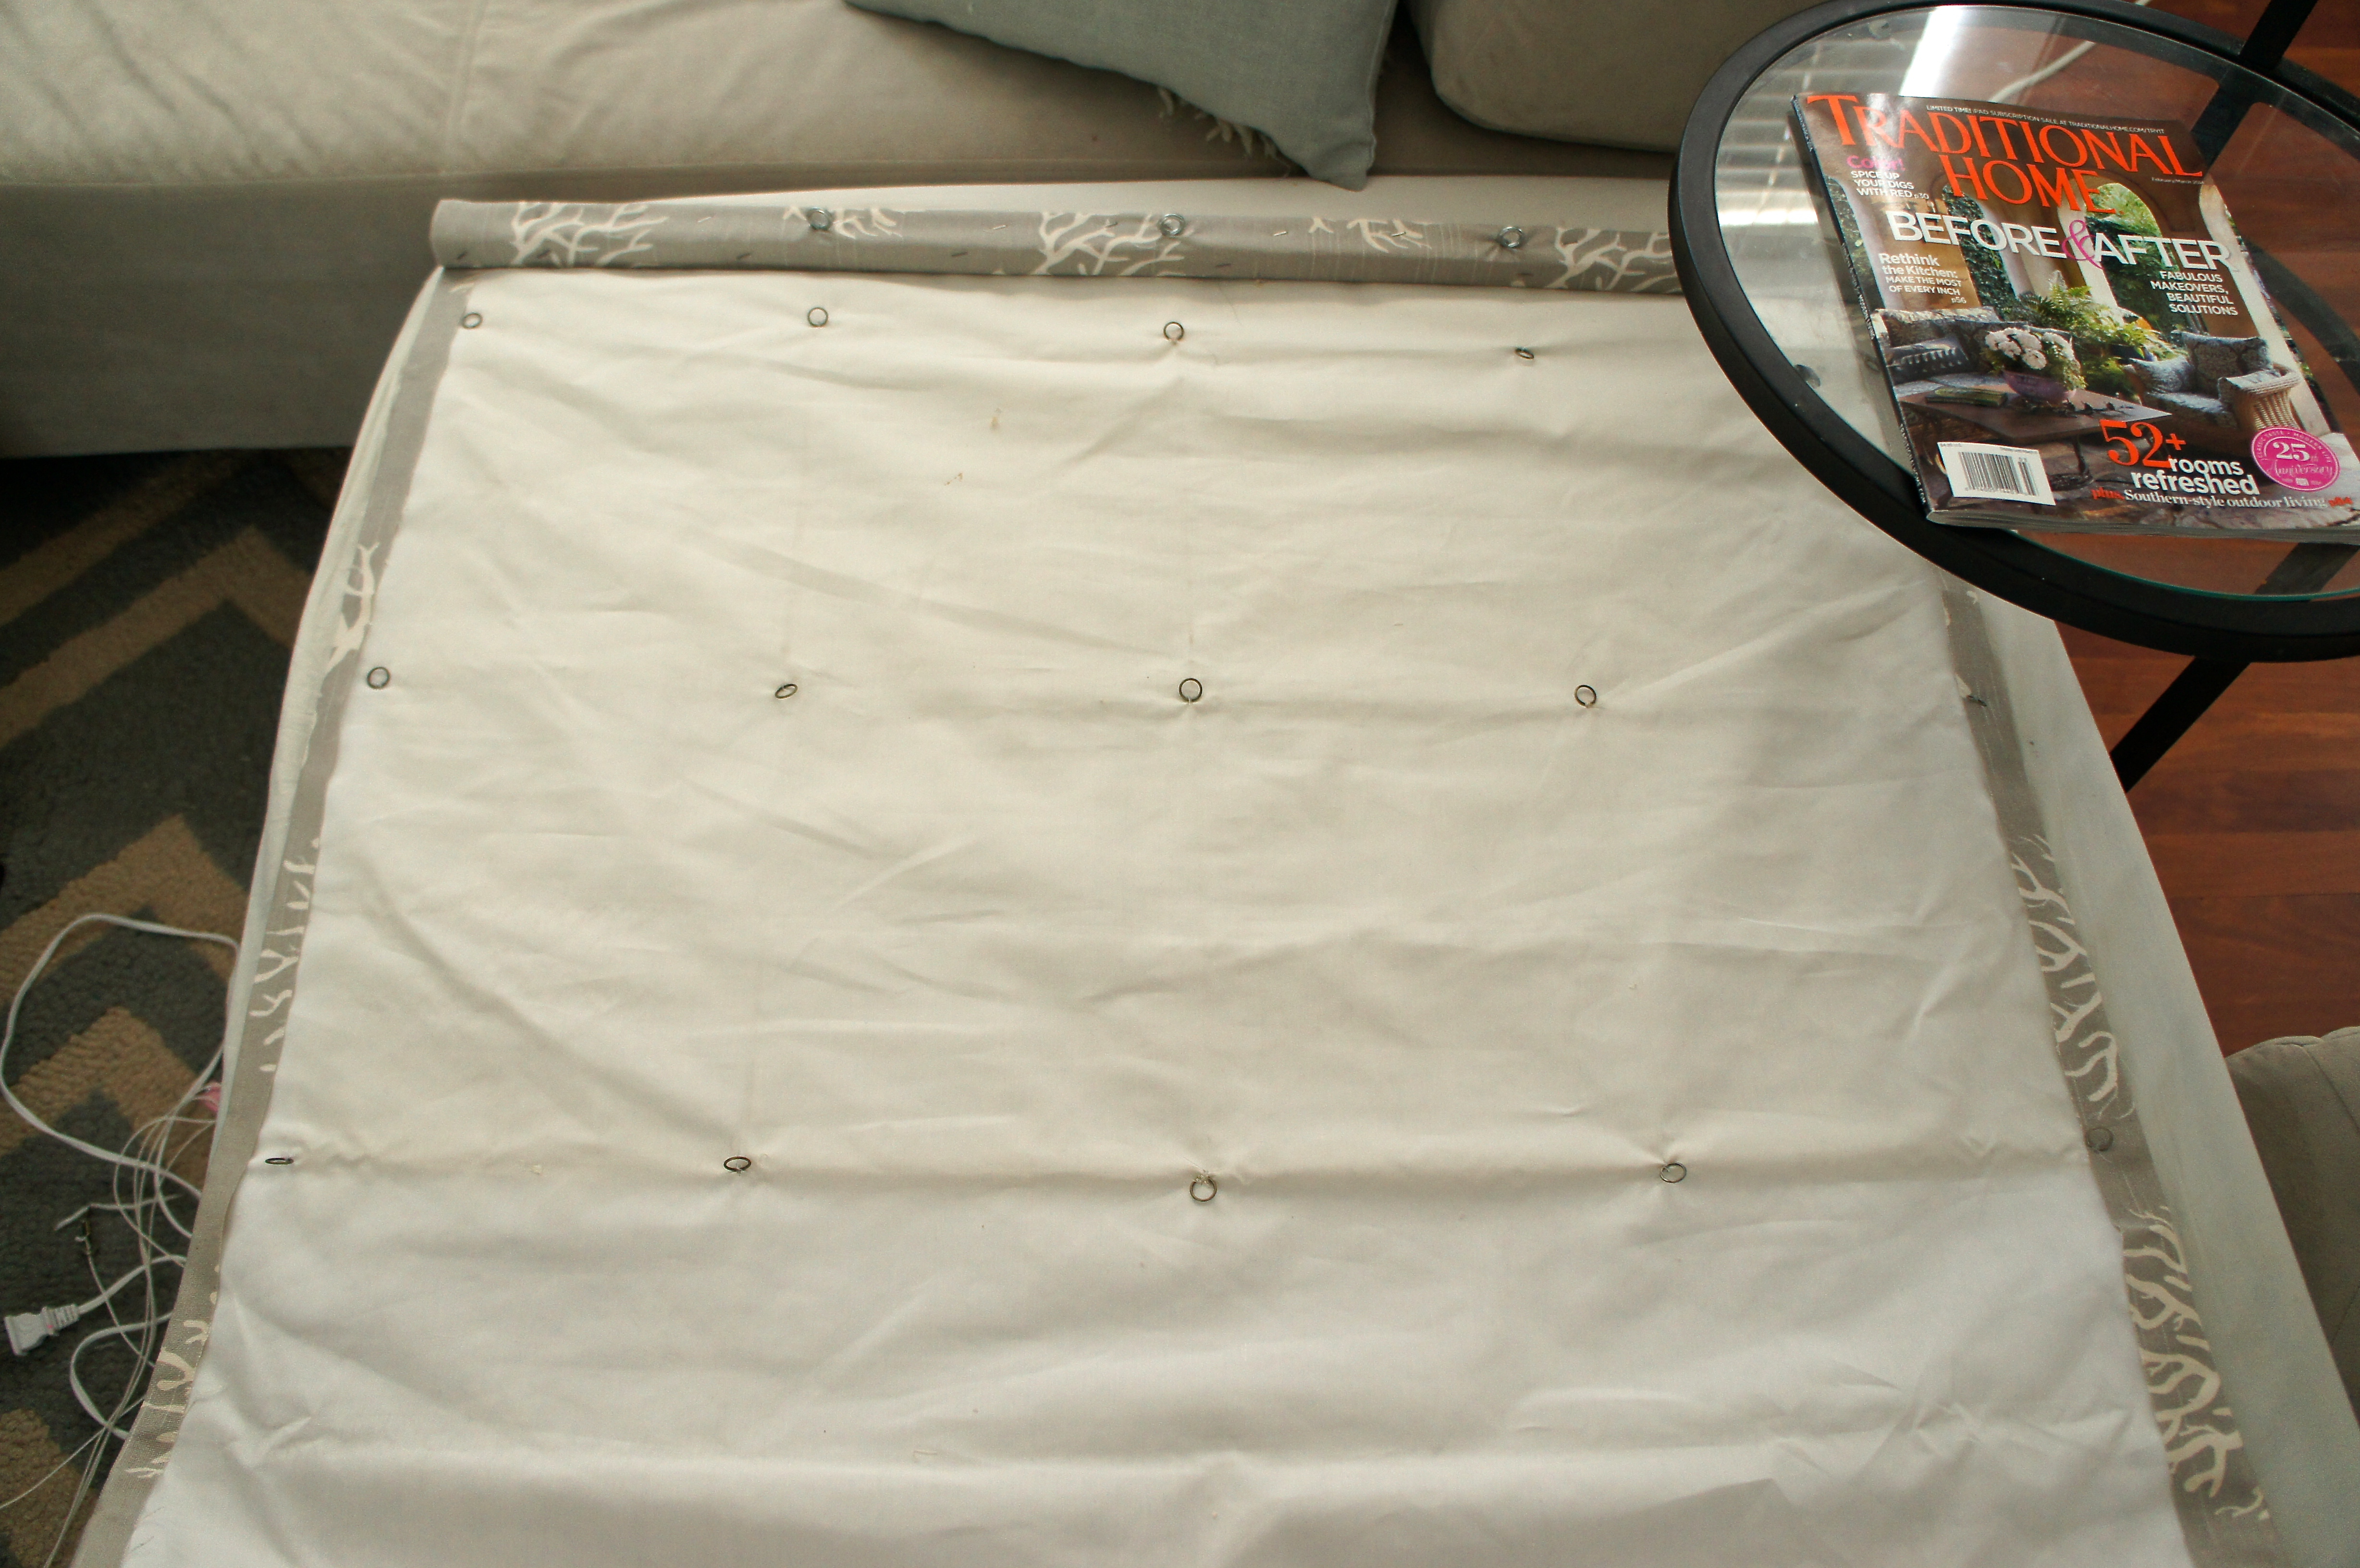
About four inches from the base of my shade, I sewed pockets into the drape to fit my dowel. My shade already had a metal dowel, but you can buy a round wooden dowel at Home Depot for a couple dollars.

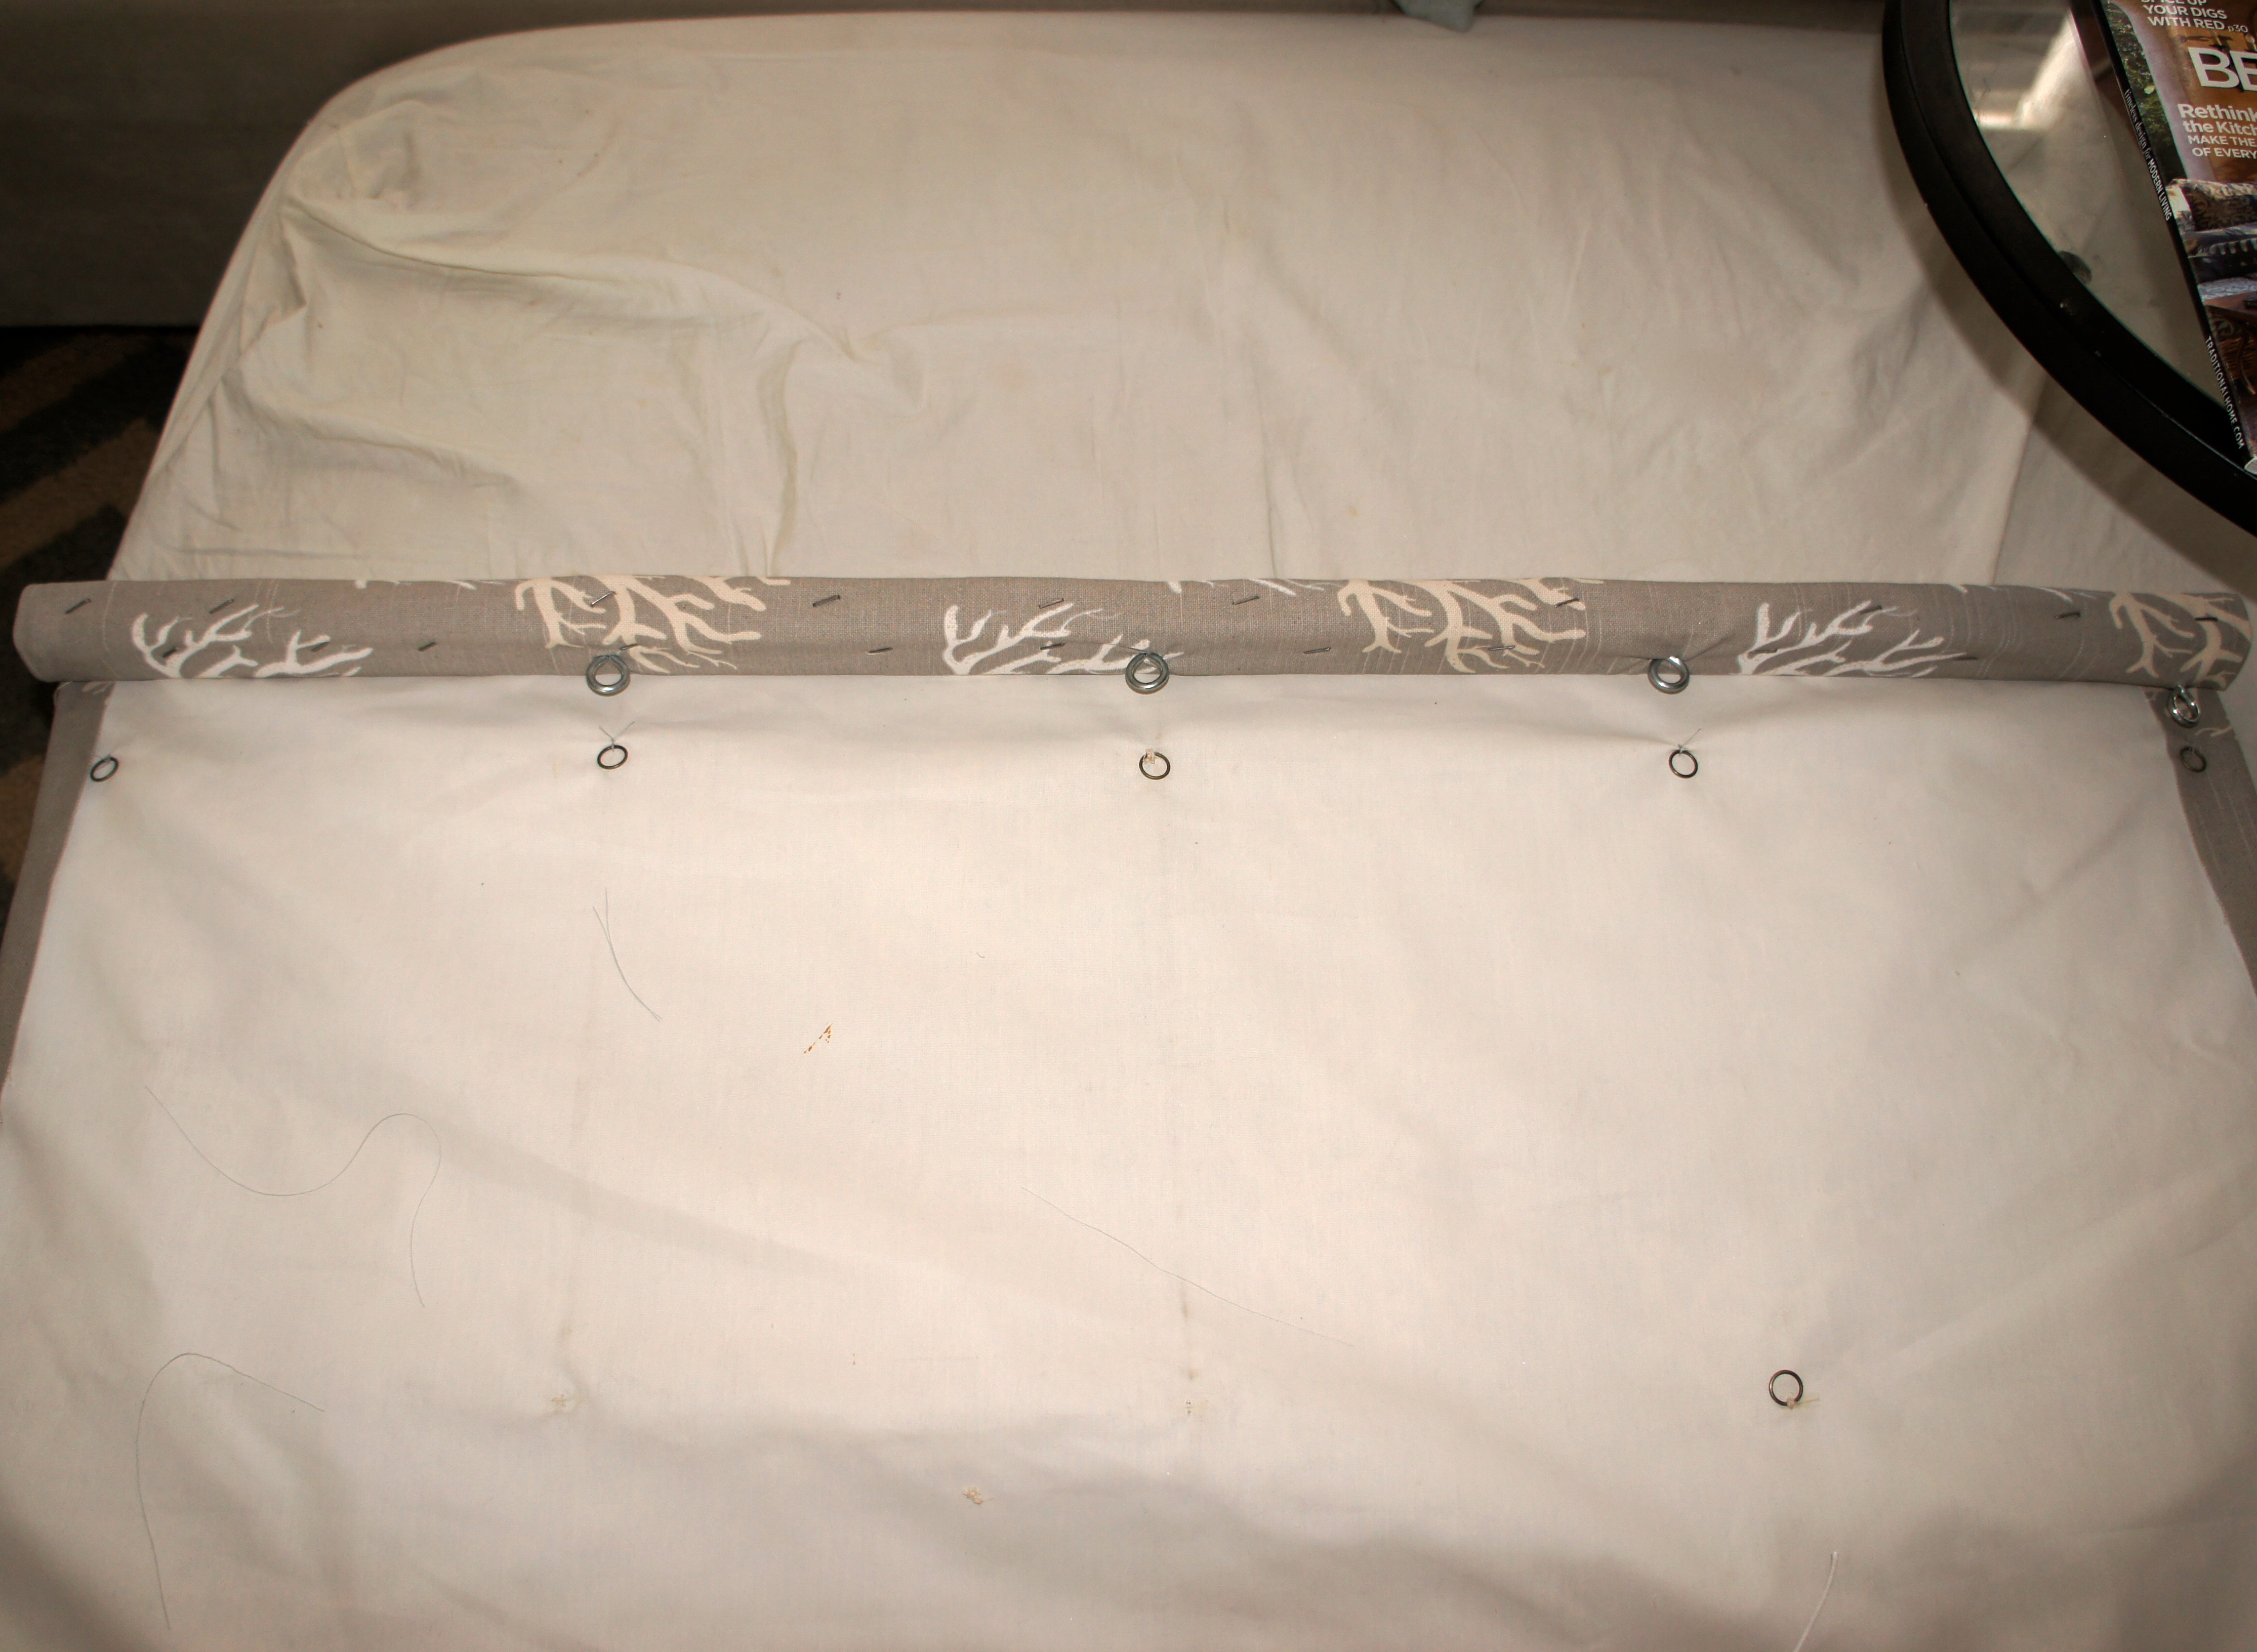
After the dowel was placed in the pockets, I folded the remaining fabric over it and hot glued everything in place. Sewing would work too, but I didn’t want a seam to show in the bottom and hot glue accomplished my goal. Then, I sewed my last five drapery rings to the top of the folded base edge, and tied drapery cord to each one of them, threading the cord up through the rings above them. This is what the back of my shade looked like when I was through:

After each piece of cord was through the screw eye hooks, I pulled them over the left and threaded them through the cord lock. It’s hard to explain the way the cord lock works, hopefully they come with instructions, but this is how it looked when I was done:
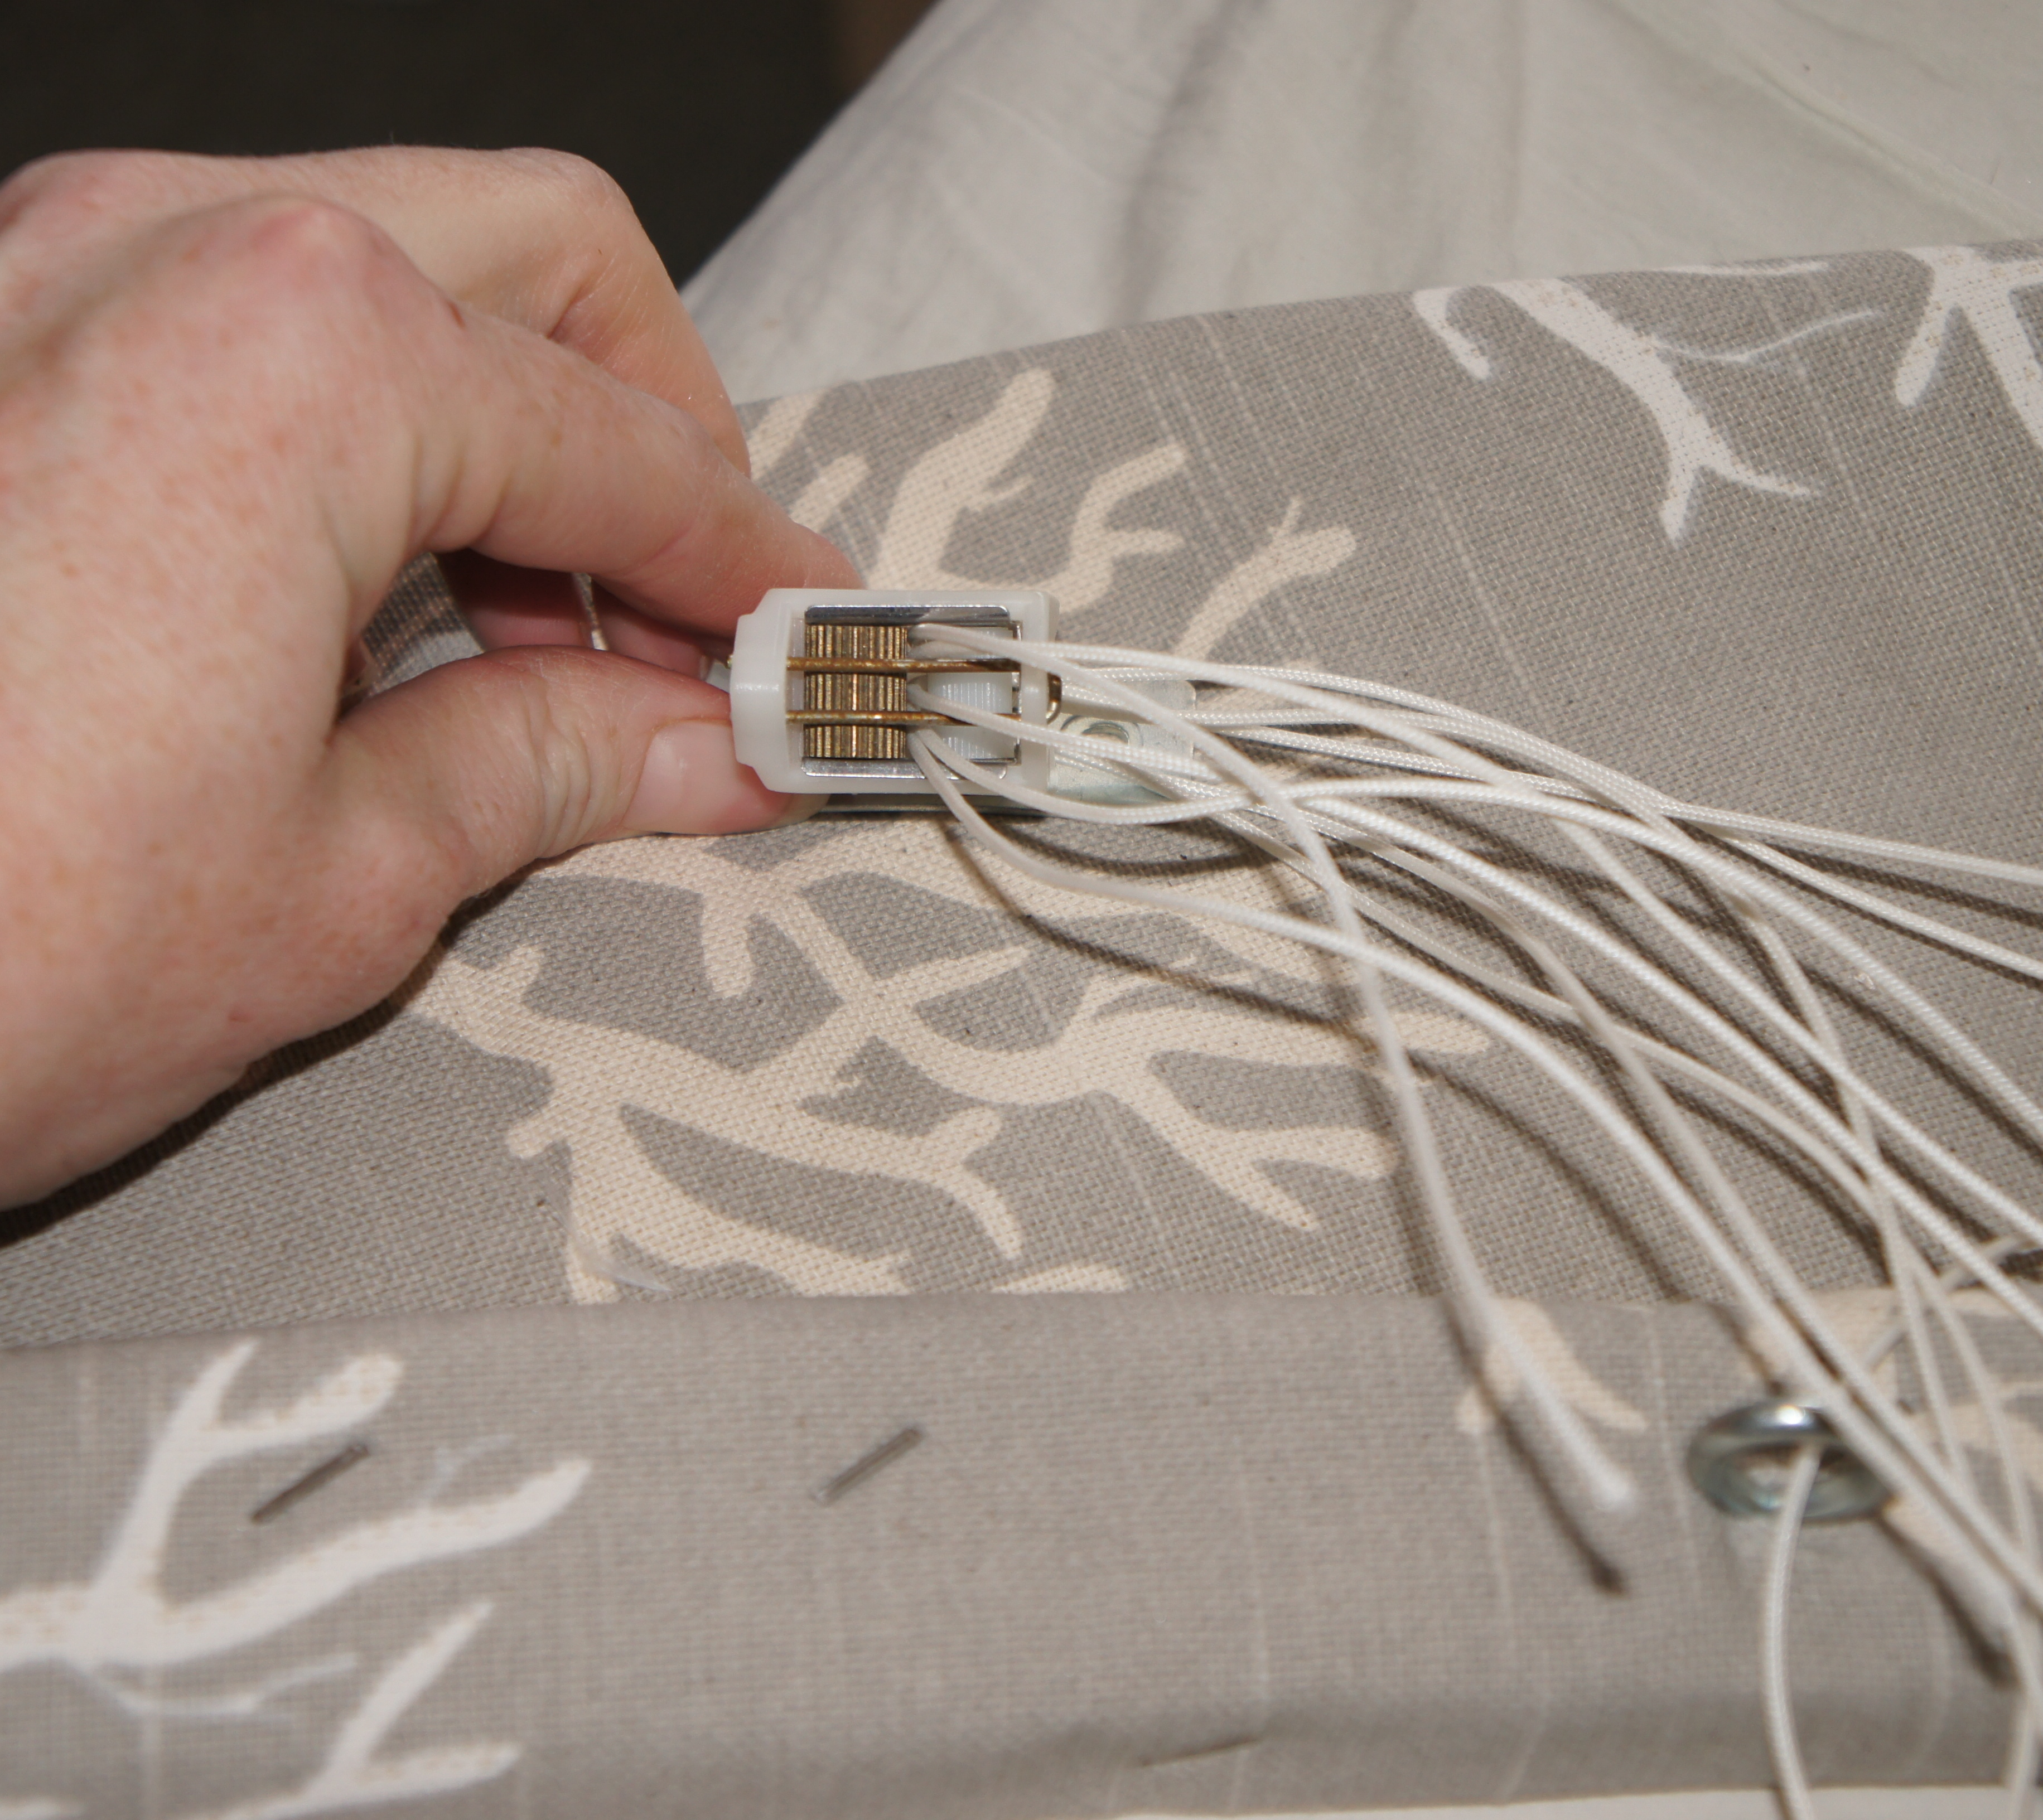
Here’s a side view:
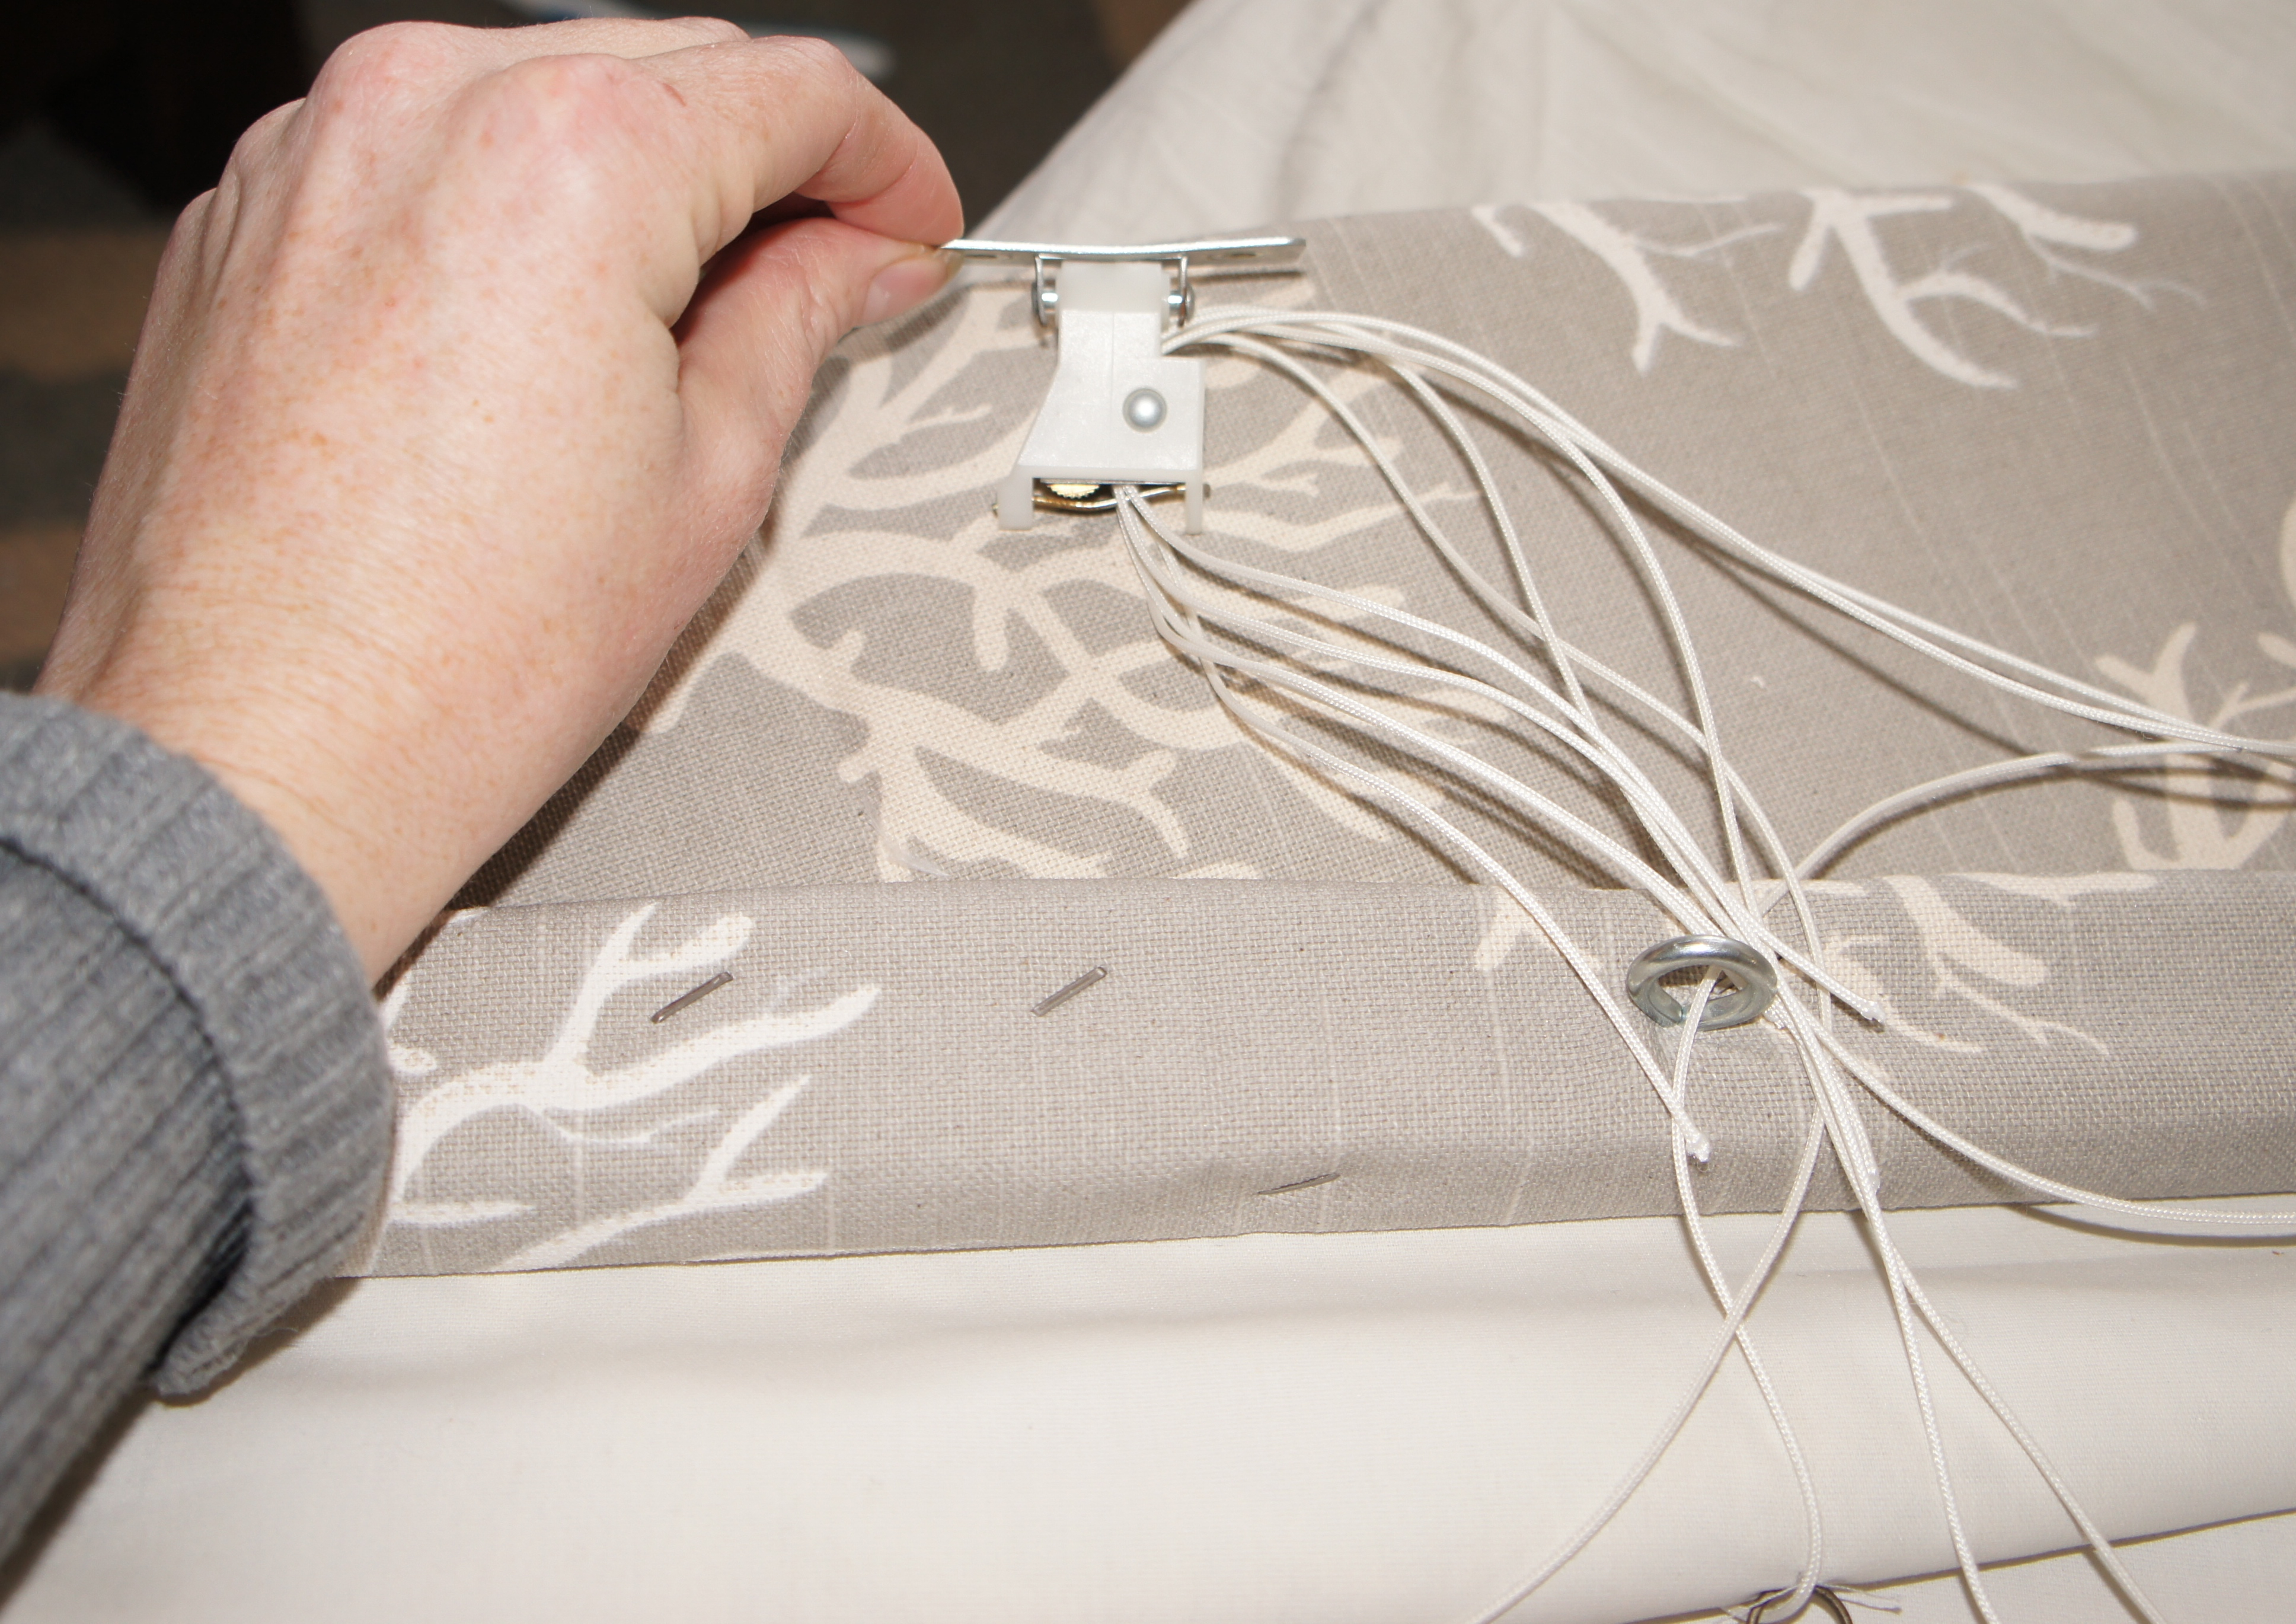
The cord lock was screwed onto the wood on the left side of my drape, and I tied my cords together in a loop. Mine are just tucked inside of the shade, still tied in a knot, but you can buy end pieces for the cords. We attached the new shade into the window frame with two screws:
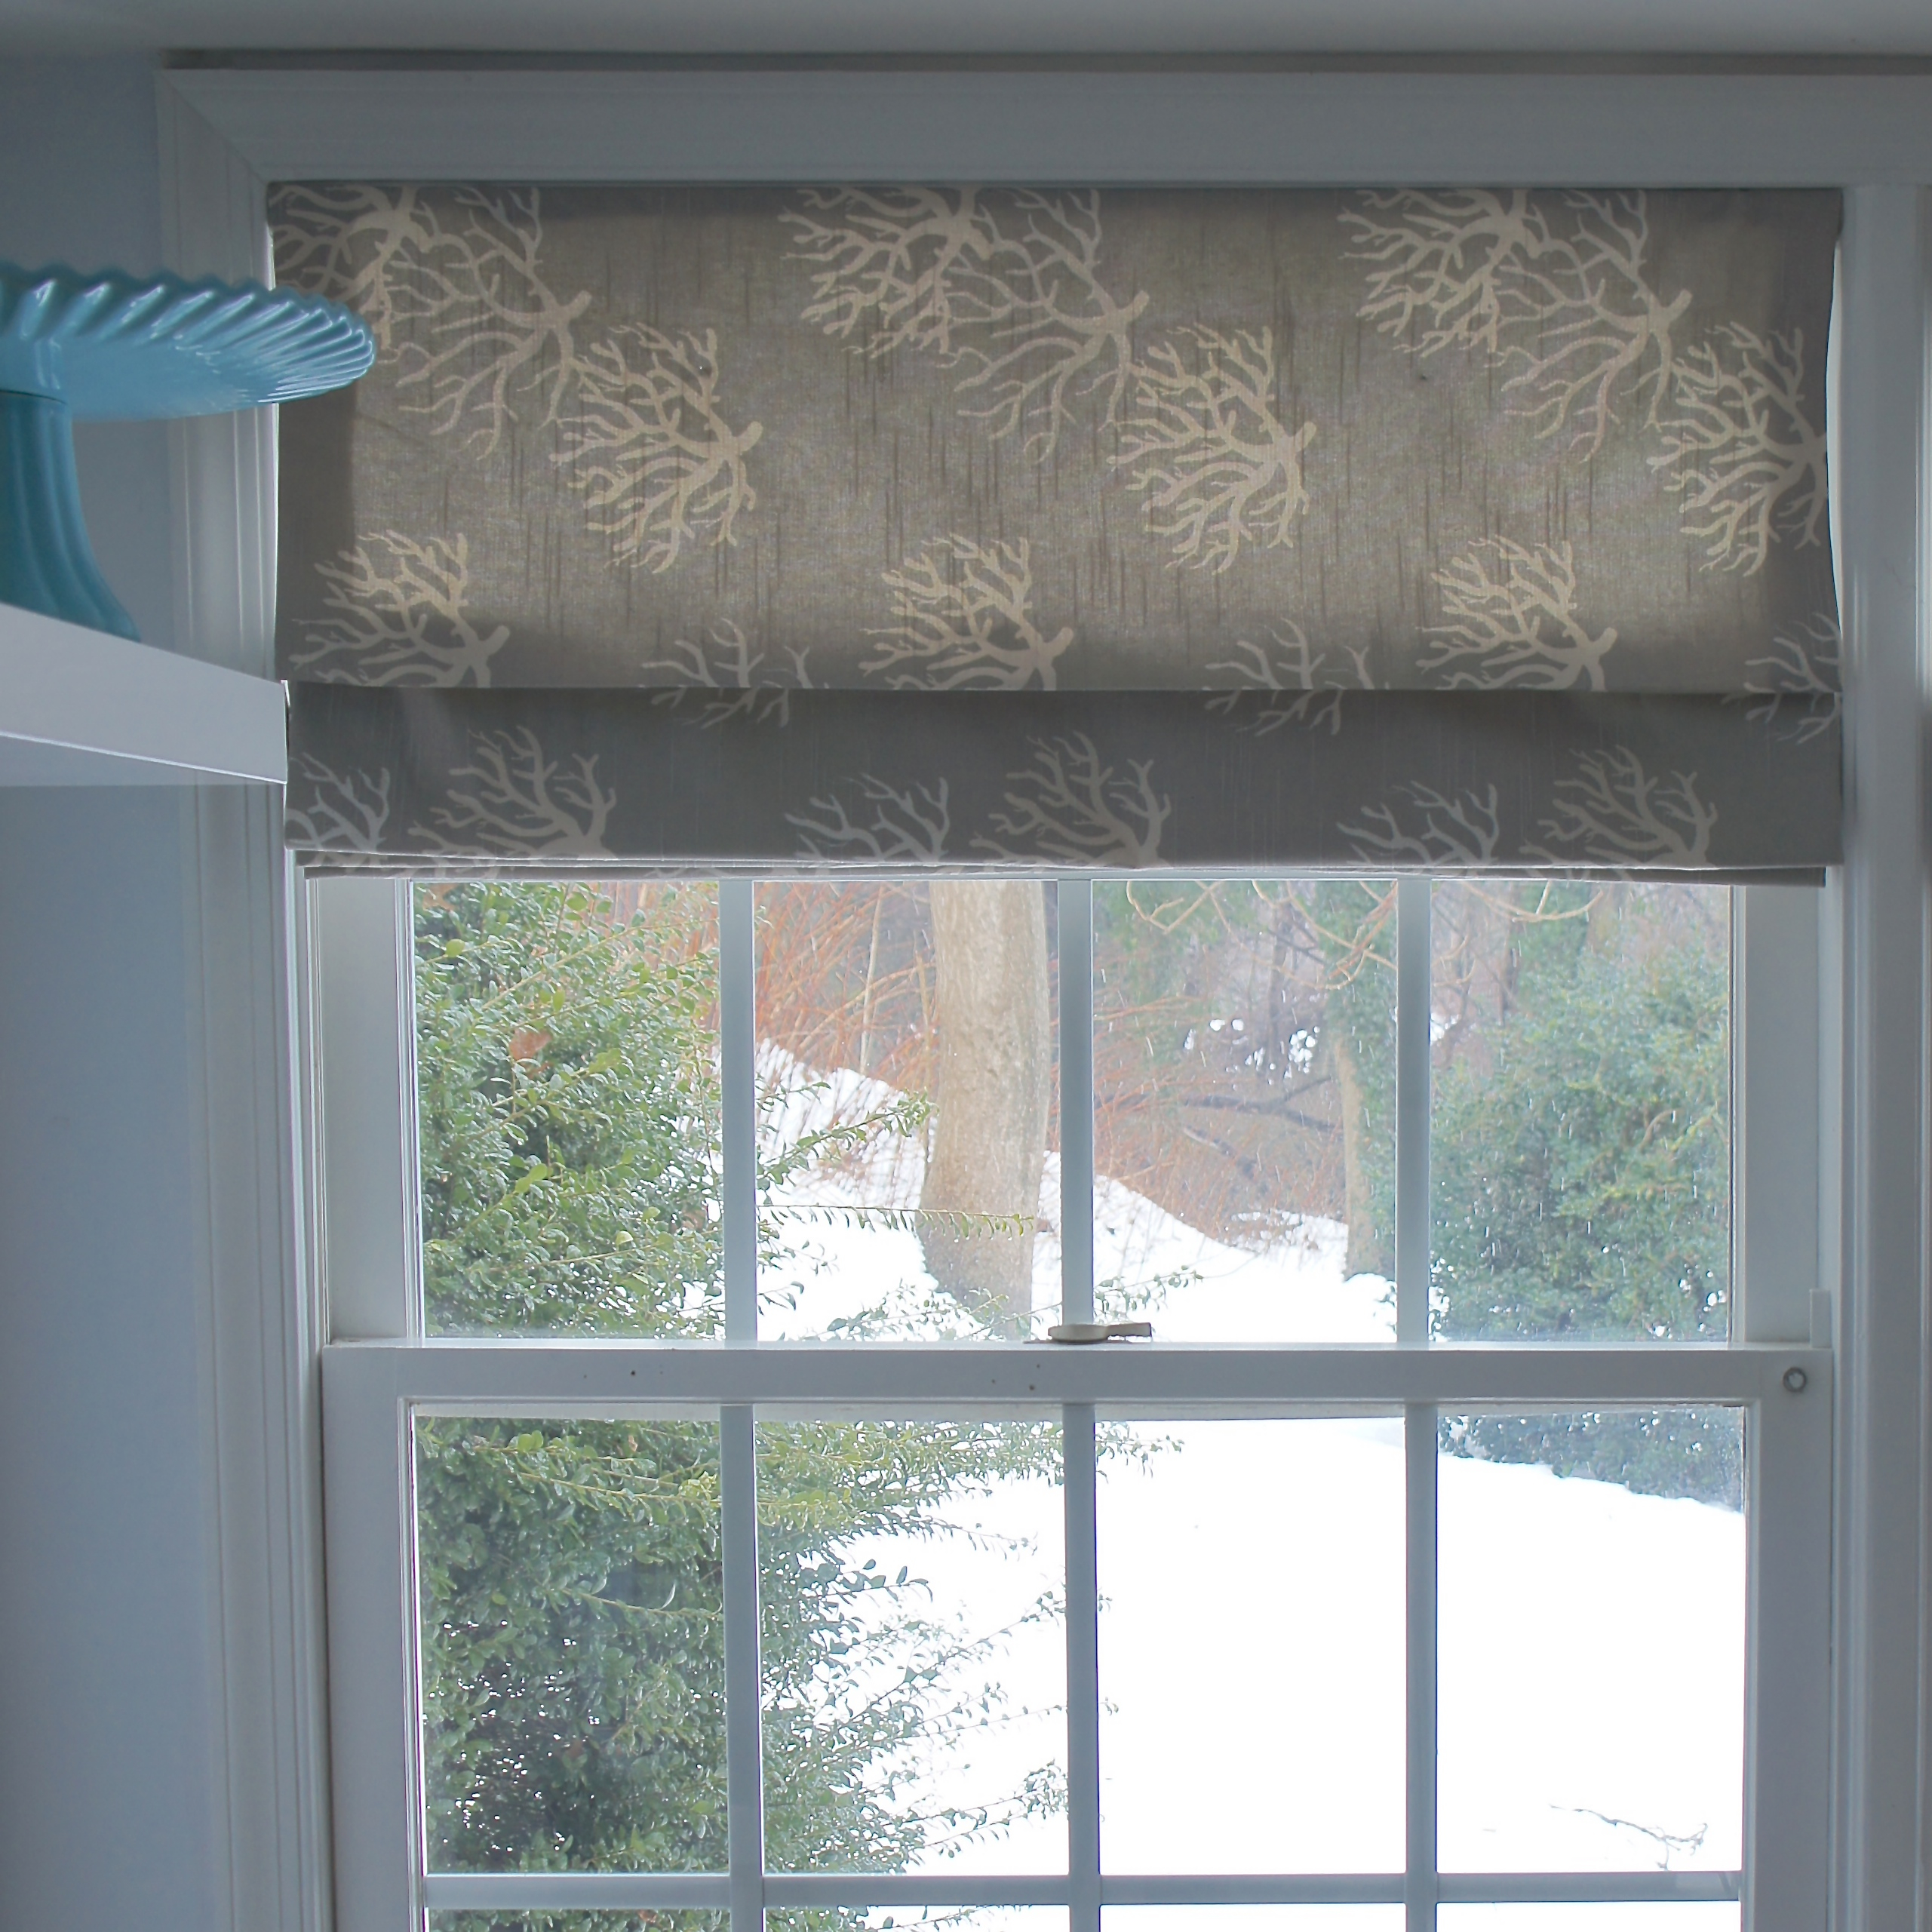
It fits perfectly. I love the new shades. They make the window look cozier, and frame our snowy view. We’re in the middle of making a built in bench for our breakfast nook, so hopefully I can share a full view of the window before the weekend is over! Luckily Jason is off for President’s Day, so he has a little extra time to work.
