We can cross one item off the to-do list because Grant’s bathroom make-over is done. It only took us a week and cost $485. Here’s a breakdown of where our budget went:
37 sq ft of Penny Tile: $227 (color: camel, from The Tile Shop)
Two buckets of pre-mixed mortar: $40
Water Ridge Dual Flush One Piece Toilet: $158
Latex Grout: $40
11 ft of 5 1/4″ baseboard trim: $20
.jpg)
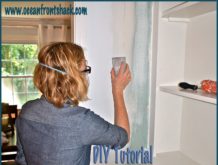
When we first moved in I replaced the 90’s mirror, painted the walls Lily White by Benjamin Moore, put a coat of White Dove on the vanity, and replaced the knobs with oil rubbed bronze pulls from Target. We already had all of the supplies we used, so none of those things cost us any money.
.jpg)
Every time we walked into the guest bath, though, the floors made me cringe. I tried to cover them with a giant rug, but it just wasn’t working. The grout was black with dirt and several tiles had broken off around the edges. It reminded me of my middle school gym locker room floor. Coming from a kid with frizzy orange hair and coke bottle glasses, that is not a good association.


Another item on the list was trim. I know people freak out about wood in bathrooms, but lots of people have wood siding on the exterior of their homes, which is hit much harder by the elements. Wood can withstand water as long as it’s properly treated, so we had no problems installing wood baseboard. It needs to be a nickel’s width off the floor to protect it from standing water, and you should paint both sides before installing. Paint is what’s sealing and protecting the wood (I like Ben Moore’s Aura for trim), so painting the back side keeps it from getting damaged if water somehow gets behind it. I caulked with painter’s caulk after nailing it into the wall, then painted another coat. Once everything dried I caulked it again with silicone bathroom caulk.

Grant was itching to get into the tub tonight. Poor kid has had to take showers all week in our room.

He’s digging the new tile, he keeps rubbing the floor and saying “balls”.

Jason replaced the old toilet (granted, he looks like he’s stealing it in the photo above, I guess I caught him off-guard) with a one-piece, dual flush, Water Ridge toilet from Costco.

This baby got her own post, but I’ll summarize for anyone who skimmed over. We bought it at Costco-they have amazing pricing on toilets, half of what you’ll pay at Home Depot. My mom said Sam’s Club has similar pricing if you aren’t a Costco member. One piece units are super easy to install, but really heavy-this thing was 110 pounds, so you’ll need help lifting. We figure we’re saving about 10 gallons of water a day now, too, and the install took about ten minutes. It’s an easy DIY project, even for a beginner.
Here’s our final product:

That’s it for the kids bathroom renovation. My cousin Amy is coming to visit next week, so I pushed to get this done before she gets here. At the moment our spare mattress is pushed up against the wall in our bedroom and the guest room has no floors, so if J fails to get moving on the hardwoods and she has to sleep in the shower at least she’ll have fresh new tile.