Early in my pregnancy I had some complications that luckily ended up resolving without an issue, but resulted in a few weeks of “not-quite-bed-rest”, as I like to call it. I was restricted from lifting pretty much anything and had to spend a lot of time with my feet up, so I got started on a few crafty nursery art projects to help pass the time.
Materials
- Flower craft punch from Michael’s
- scrapbooking paper and wrapping paper
- glue gun
- multicolored mini brads
- straight pins
- 12 x 12 Ribba frame from Ikea
To display the 3D artwork I had to use a shadowbox frame. All of Ikea’s square Ribba frames can be mounted with our without a shadowbox display, and I like to match all the wall frames in a room.

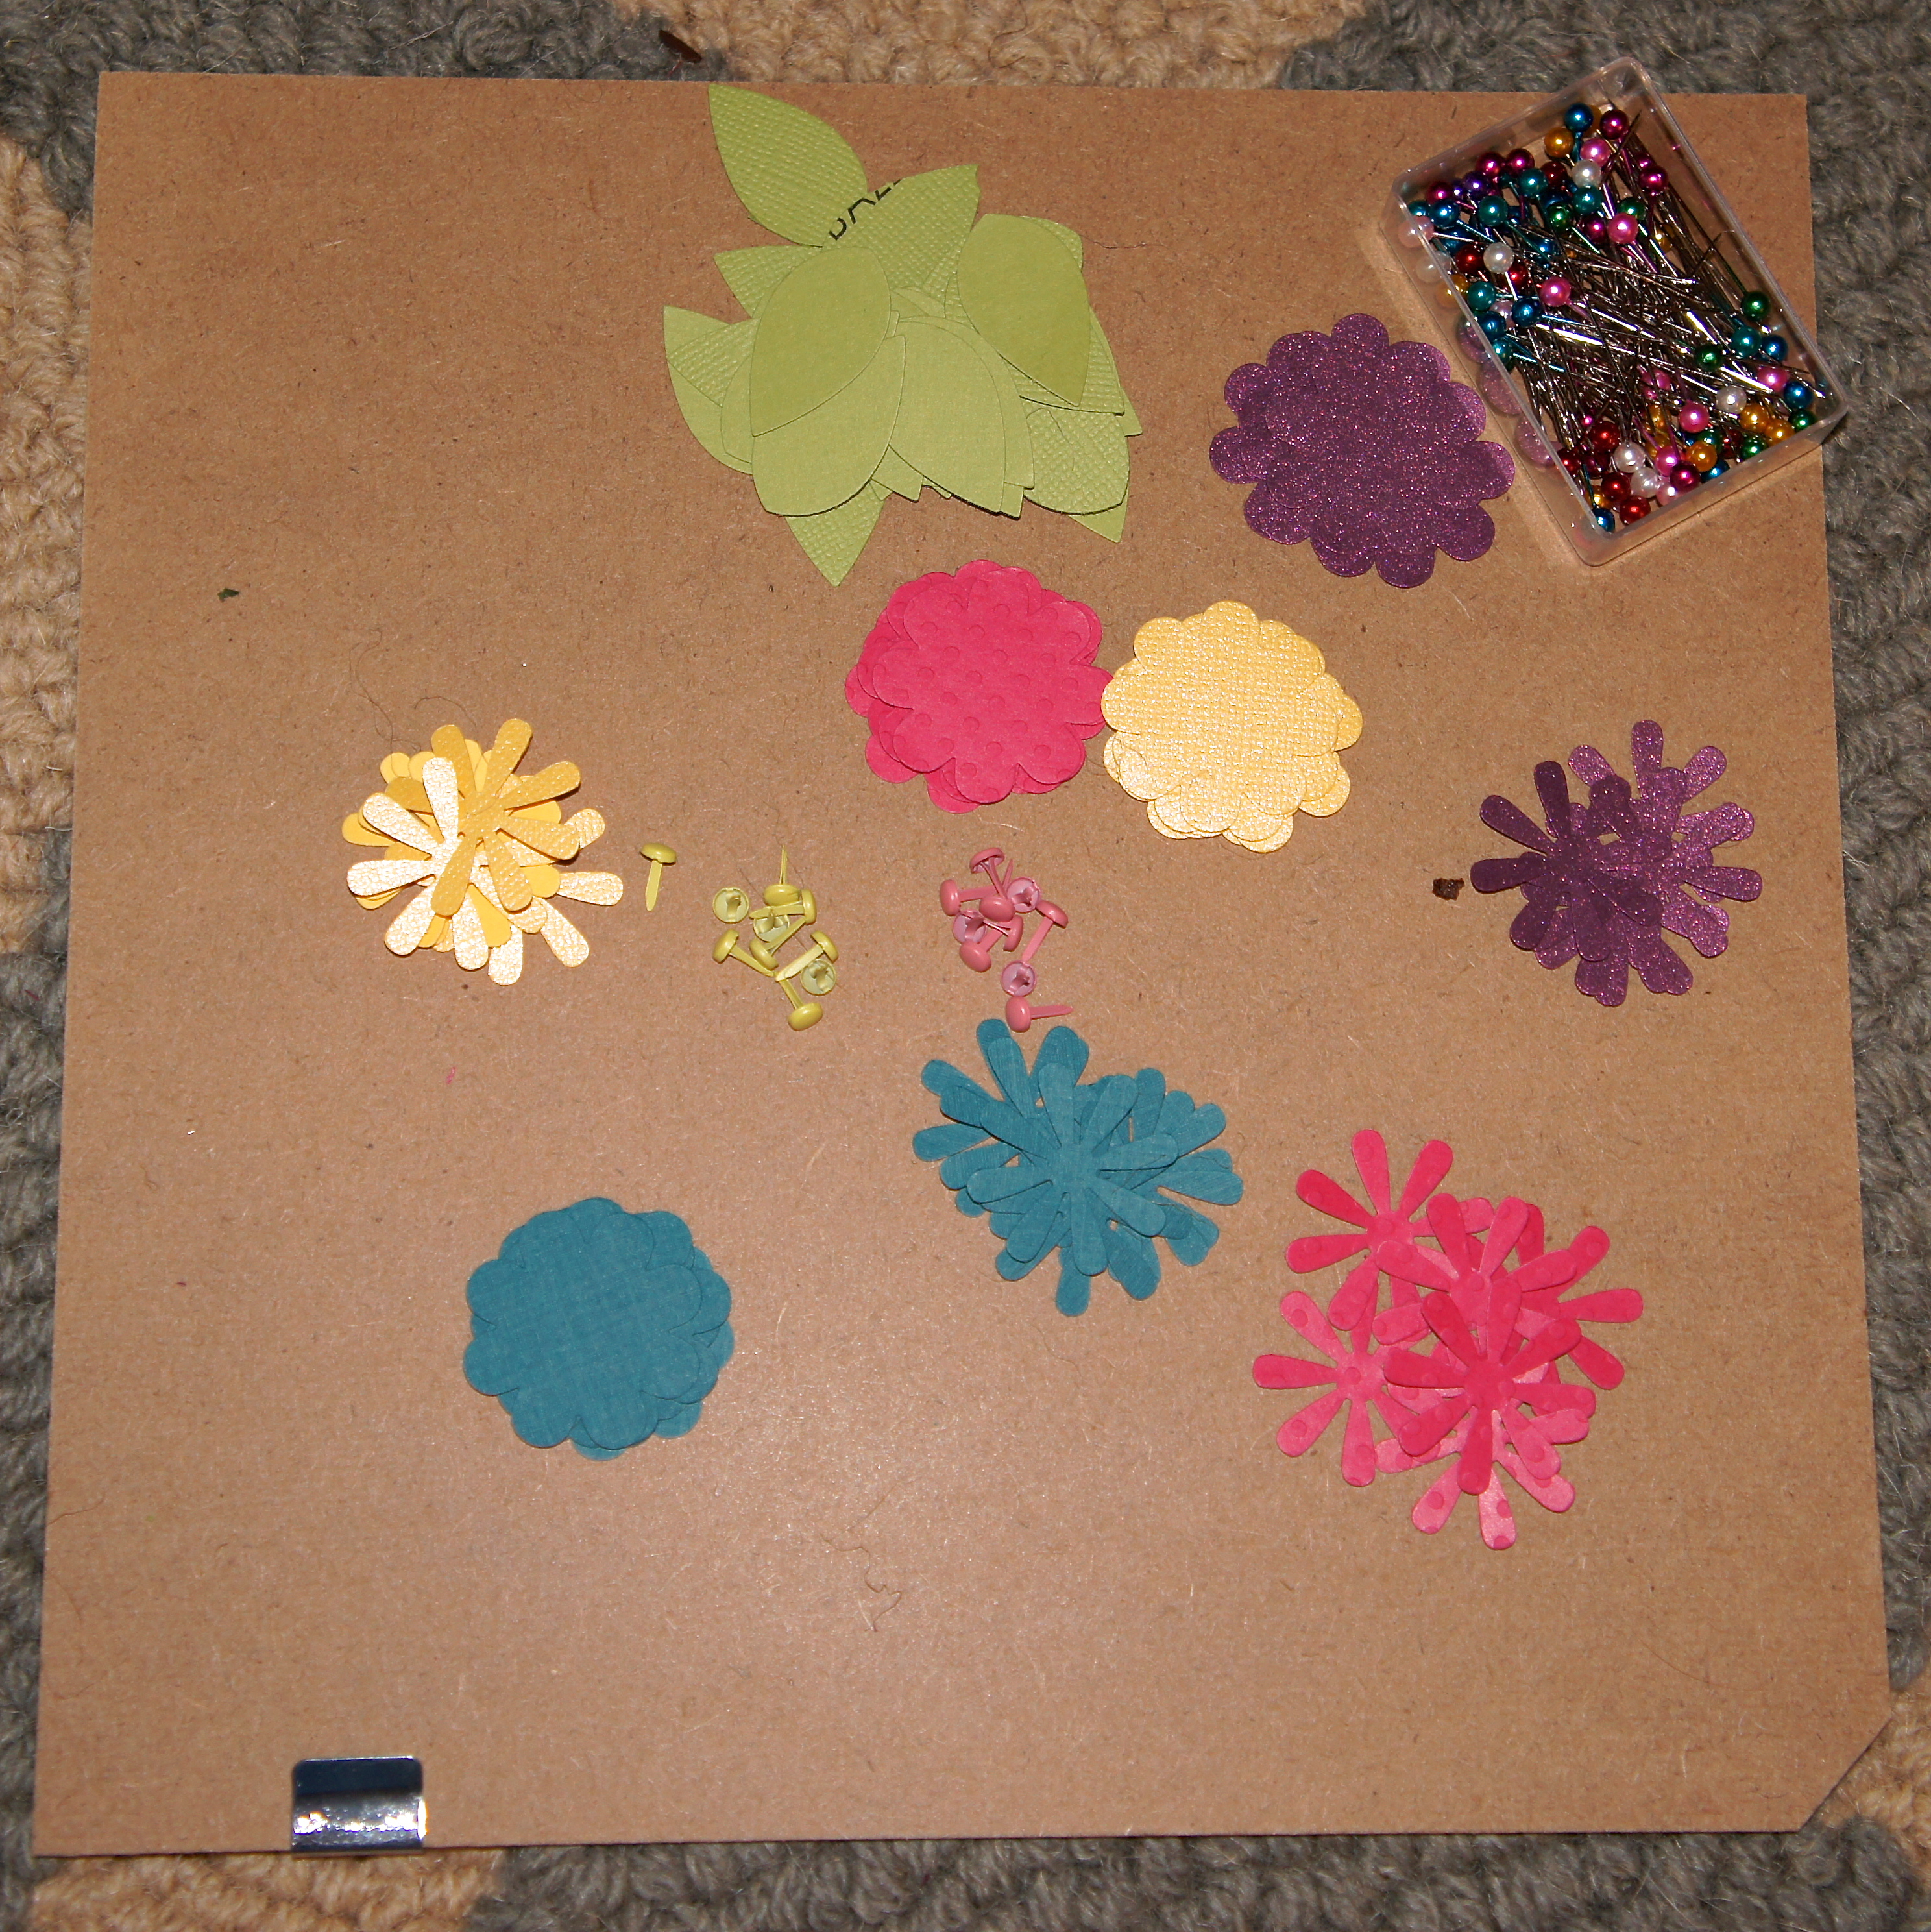
The craft punch cuts out four different shapes that are glued together to make the flower:

I cut out four different shades of cardstock and separated everything into different piles:
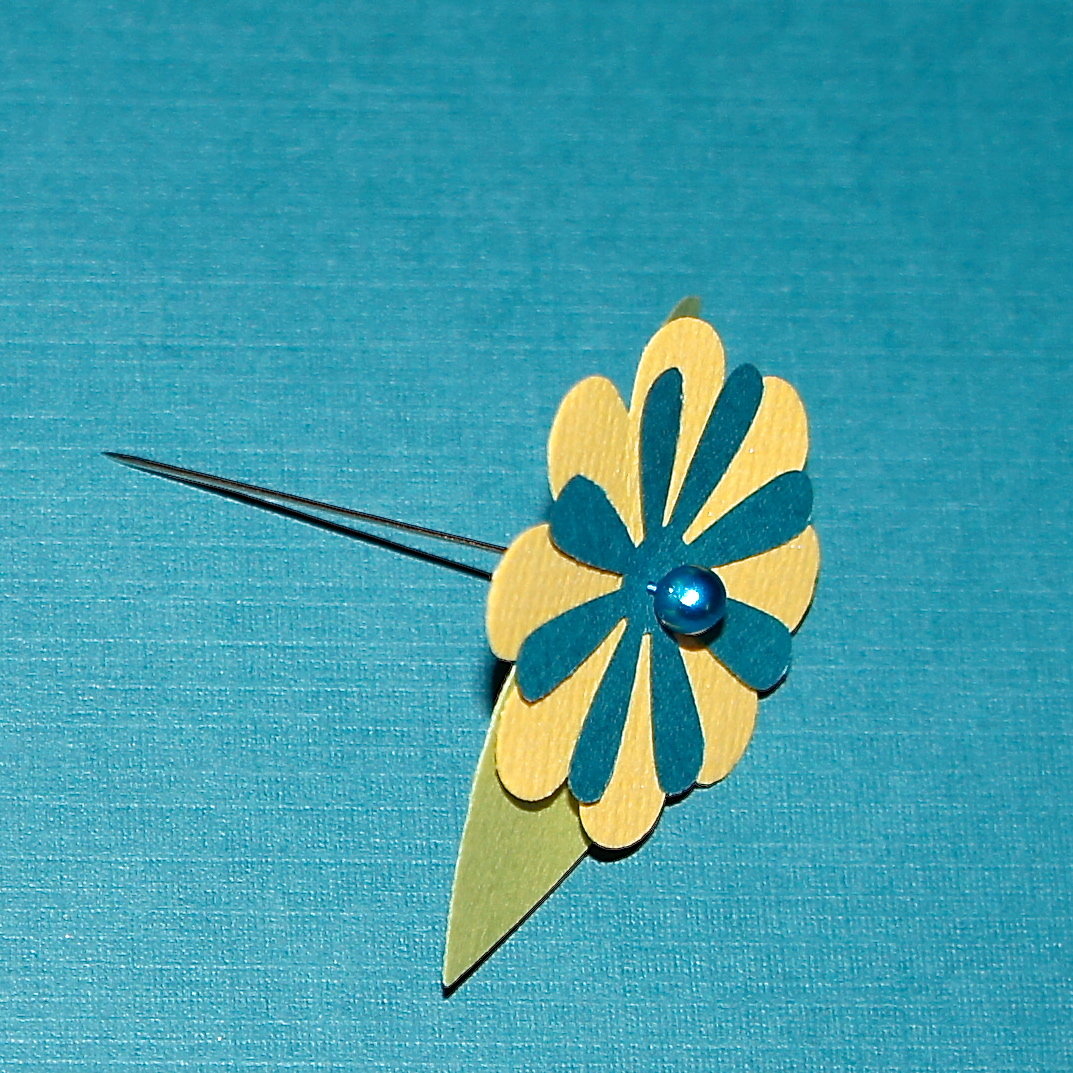
The layers of cardstock were too thick to fit the brad through, so using a straight pin I attached each of my flowers layer by layer, and then put the mini brads through the hole made by the pin:
After the flowers were assembled, I put a bead of hot glue on the back of each one and attached them to a piece of cardstock already inside of the framing matte, to make sure everything was straight.

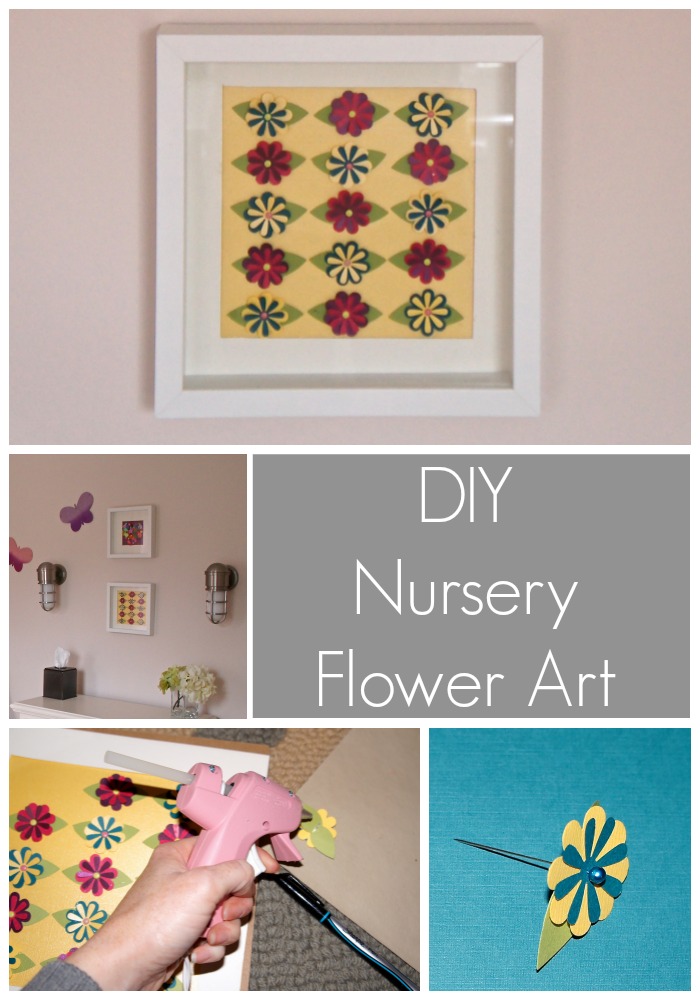
And now, for the finished product:
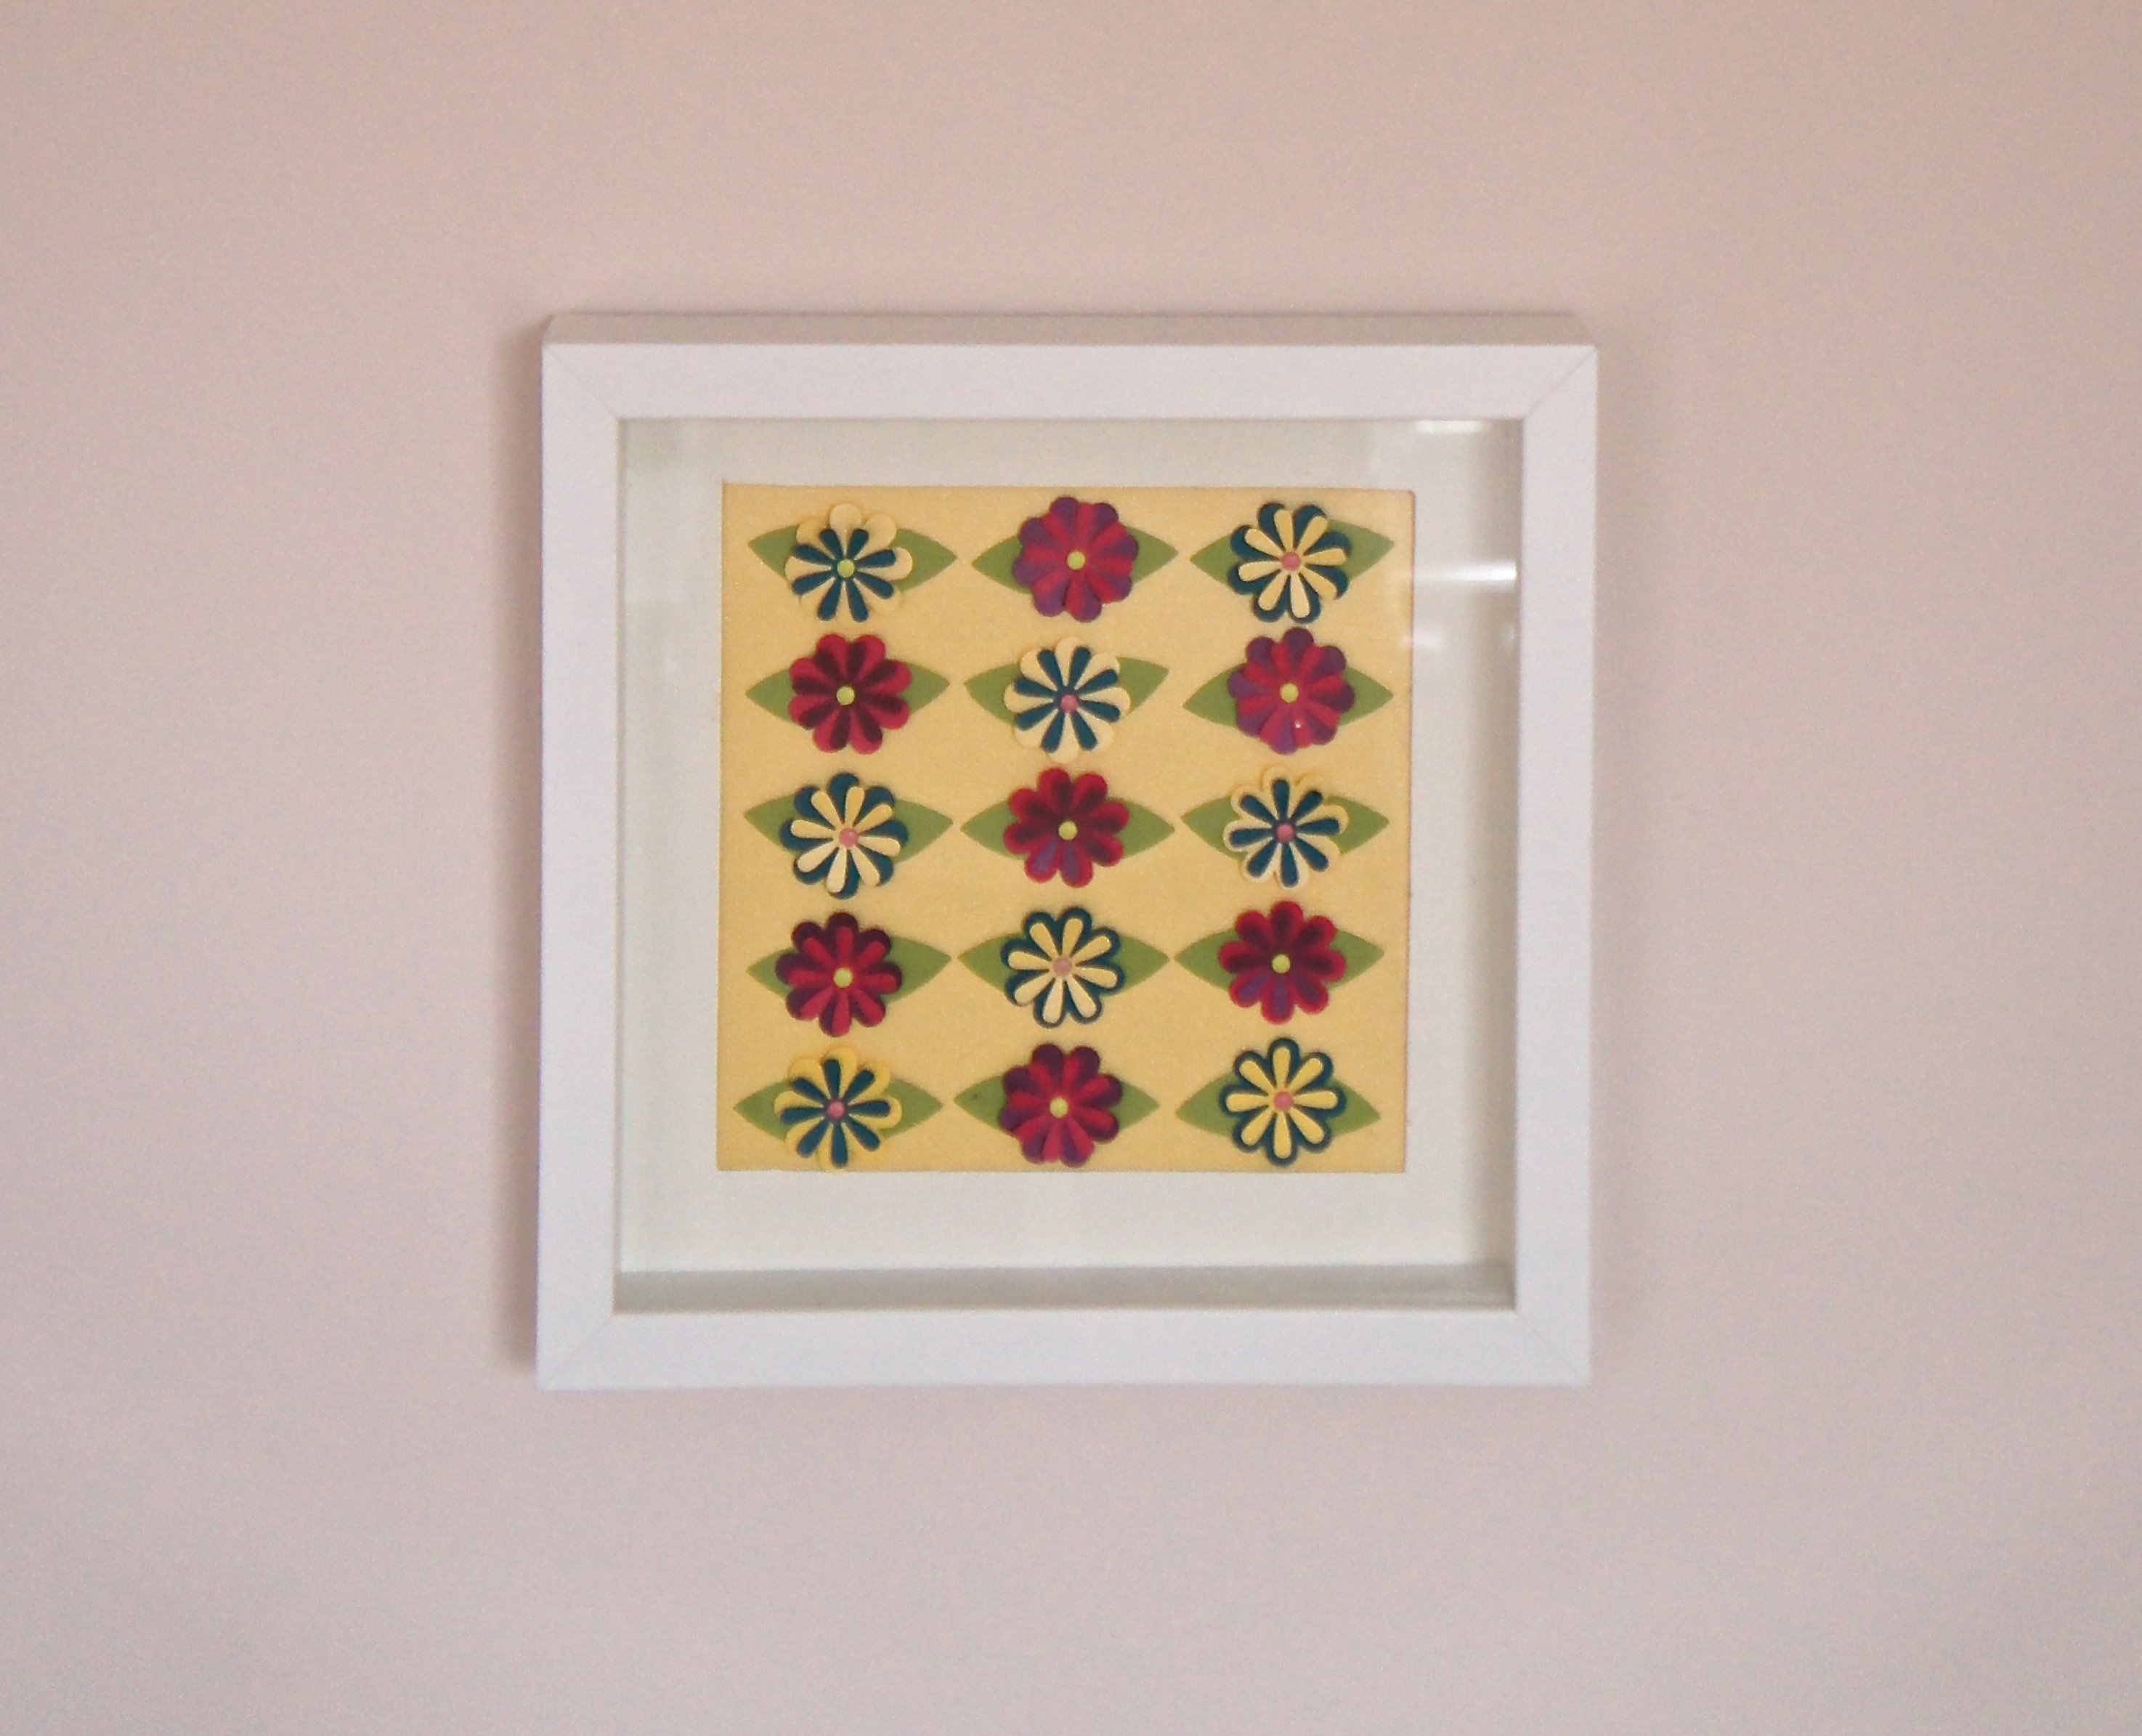
Bright, cheerful, and it cost about $18 to make. Exactly what we were going for. This is how it looks on the wall in the nursery:
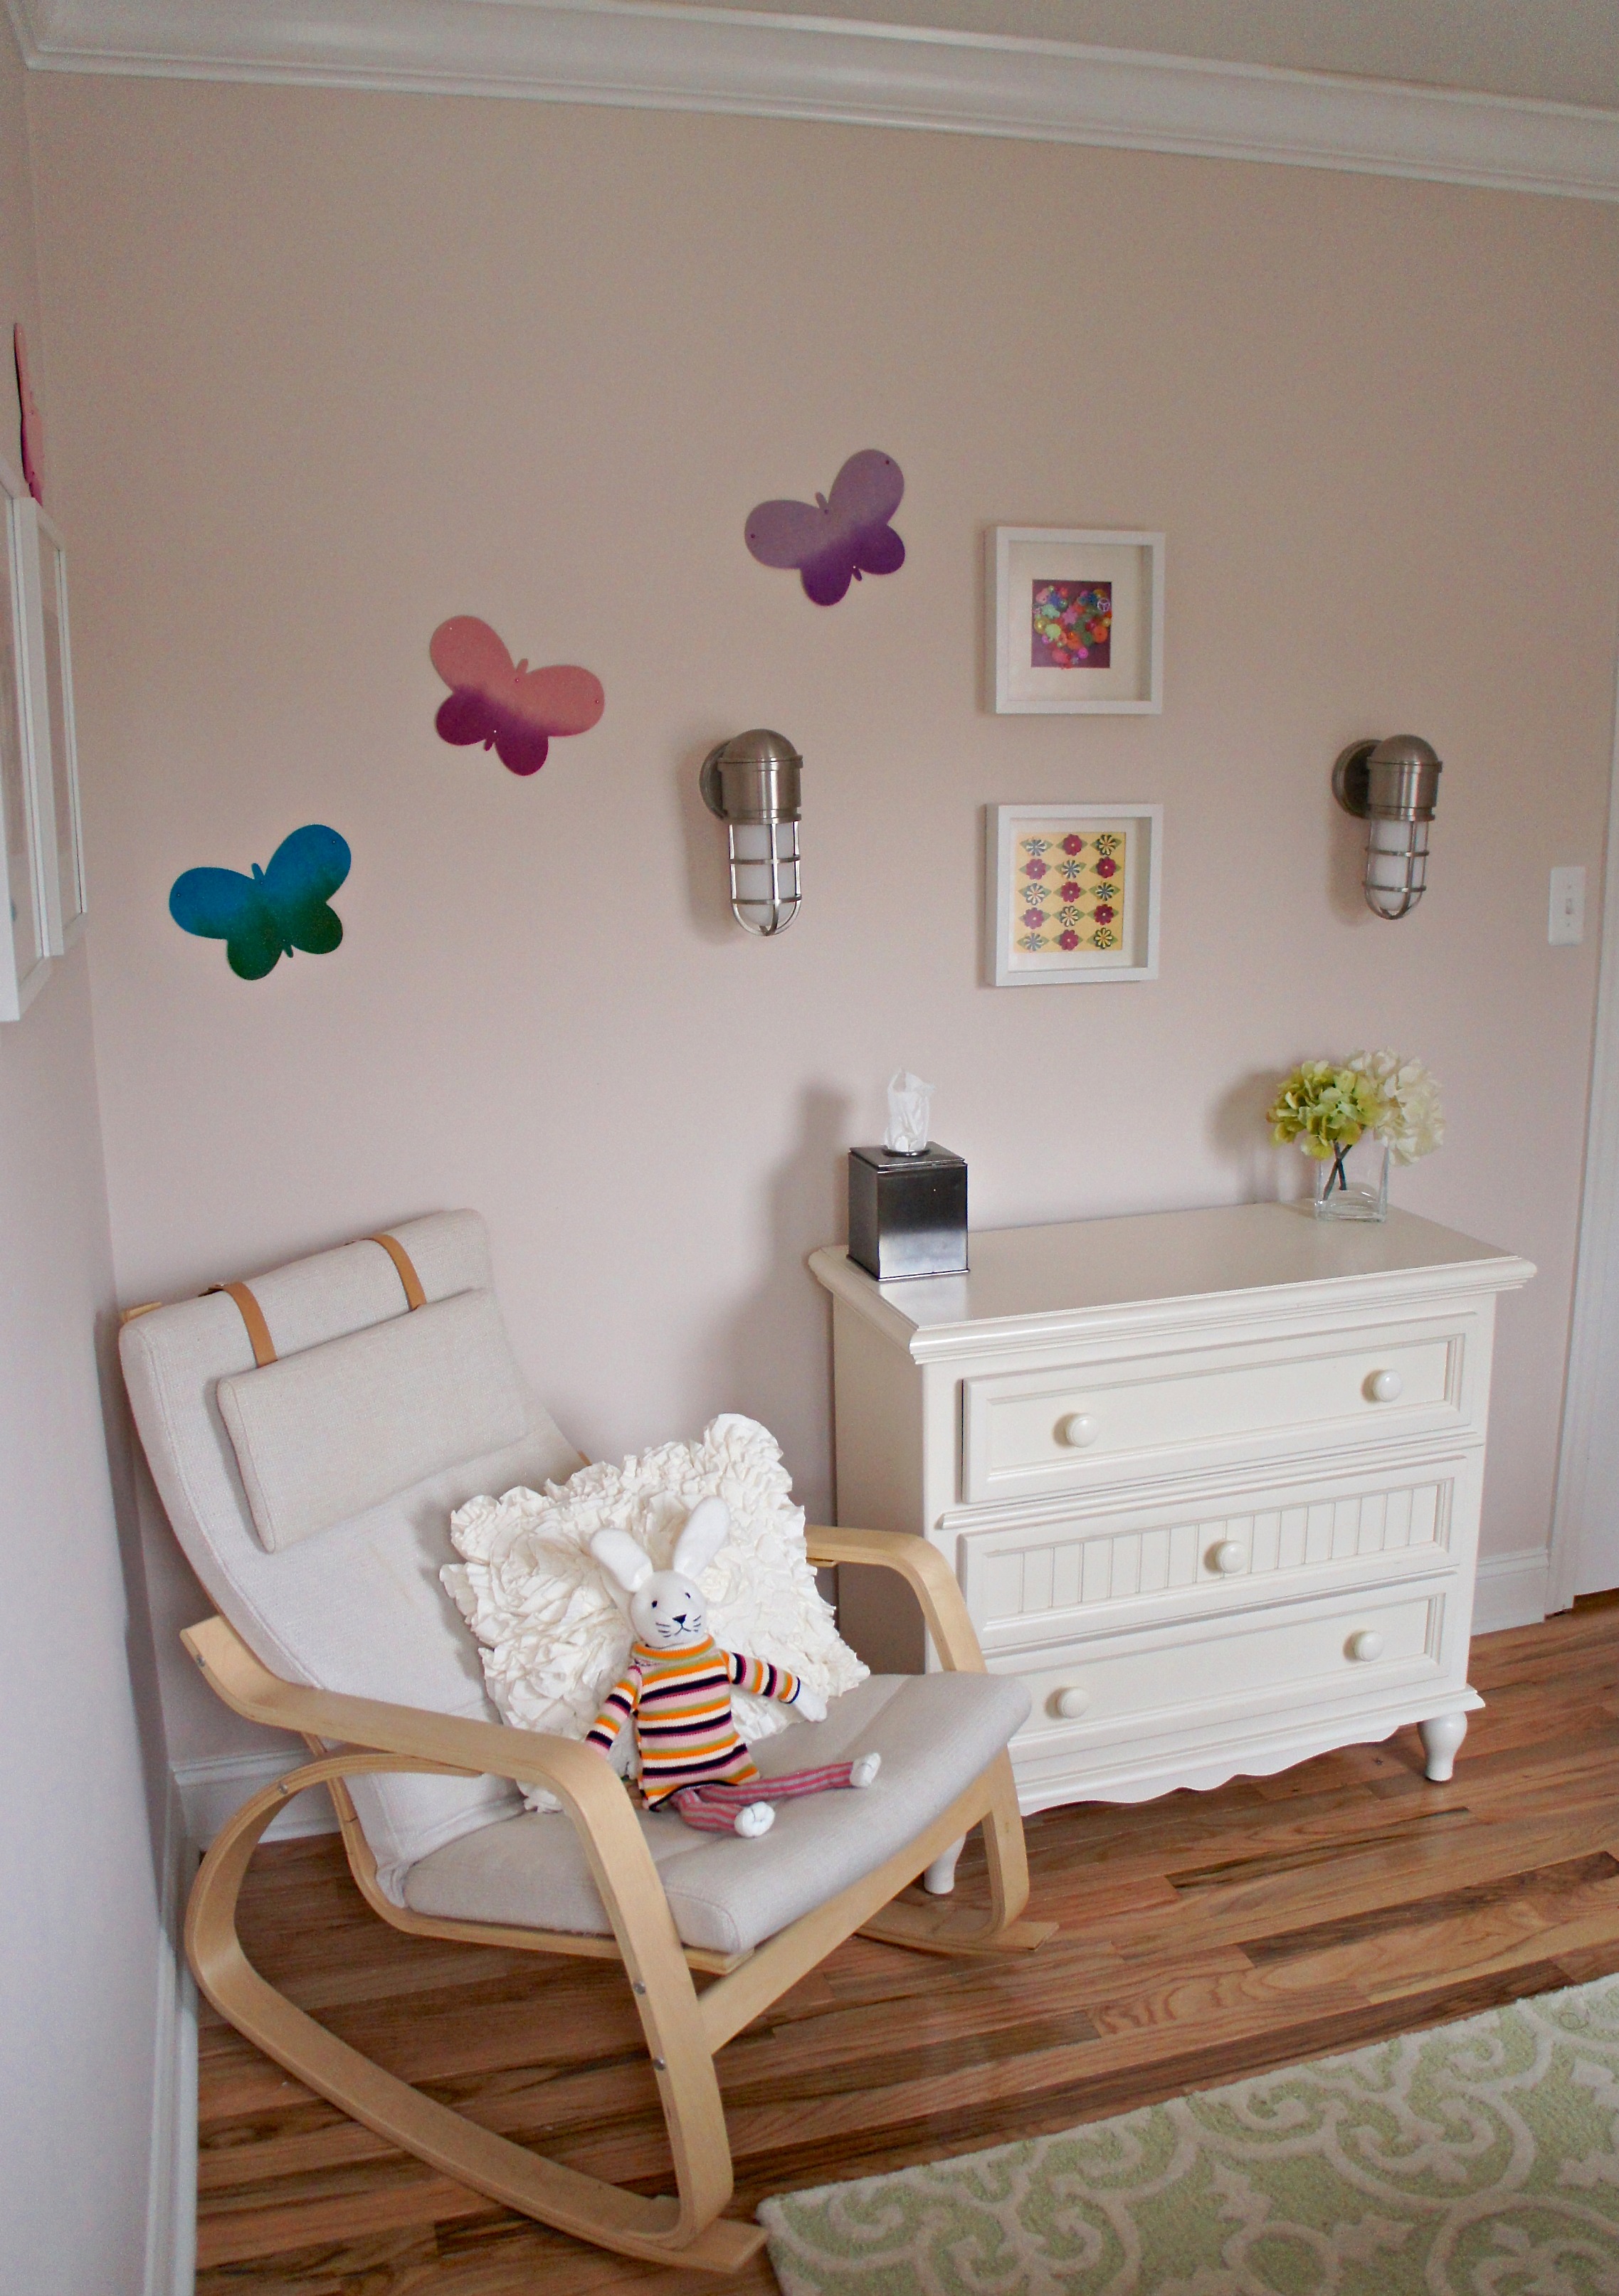
It definitely brightens things up, and should be stimulating for an infant to gaze at. In Part II I’ll share the 3D button art above it. Happy New Year!