Every six months the non-stop house projects start to become too much for us and Jason and I realize we need a vacation (usually because we are driving each other crazy). This weekend marked that biannual occasion, so we booked a trip to Virgin Islands last night. This will be our first vacation without Grant, and I’m excited (although freaking out at the idea of leaving him) for a full week in which the only multi-tasking I do is holding my drink while reading my Kindle. I can’t wait to sit at a restaurant with my husband and not have one eye on my iced tea the whole time to make sure no one dumps it in my lap.
Tools Required:
1. Table Saw
2. Mitre Saw
3. Treads (ours came from Home Depot)
4. Riser-again, oak from Home Depot (and scrap wood, the size will depend on your stair dimensions, plus a drill and wood screws)
5. Nail gun with 2″ finish nails
6. Pliers (for removing carpet staples)
7. Phillips head screw driver (for removing carpet staples)
8. Varathane Fast Dry Wood Stain in Natural
9. Varathane Fast Dry Polyurithane
10. Orbital sander with fine grit pads
11. Caulk
12. Paint (if you plan on painting your treads instead of staining)
13. Paintbrush
14. Papertowels
15. Staircase nosing-for your top step
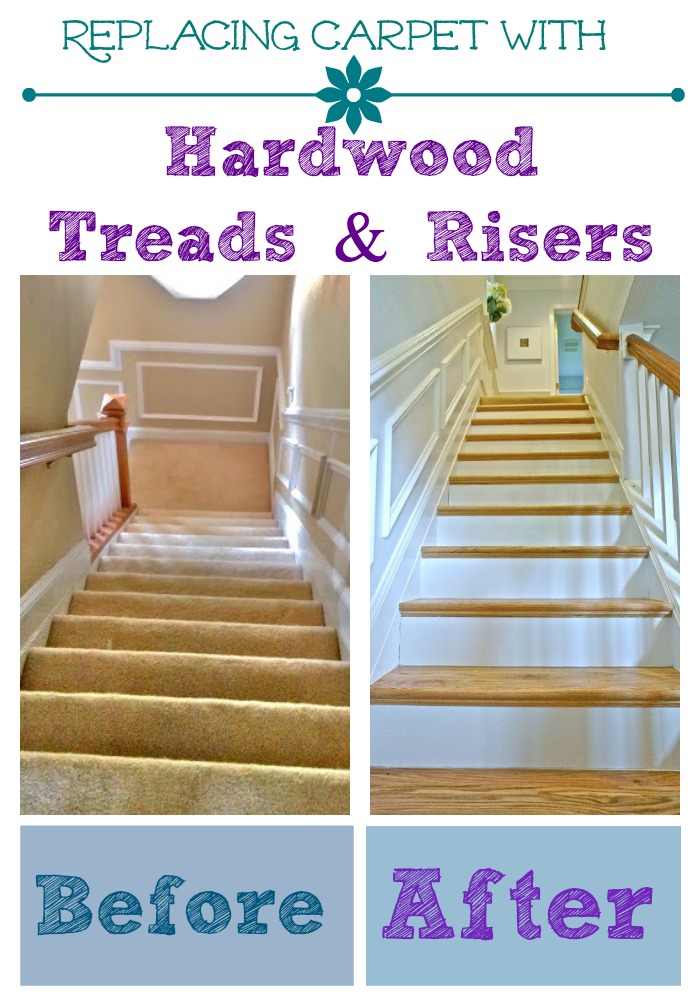
I initially thought we could just pull up the old treads and risers and put the new ones on. It doesn’t work that way. As Jason explained to me, the house is basically built around the staircase, so that would require a professional. We ended up covering the existing pine treads and risers in new oak ones. We started by ripping up the carpet and pulling any nails and staples. For anyone out there who is not an expert in stair terminology (myself included until a couple weeks ago), the tread is the piece you step on and the riser is the vertical piece.

Most stairs also have cove molding, which is a piece of trim that goes beneath the nose of the tread.

After removing all of the carpet and nails, we measured our existing stairs and cut the new treads horizontally with the table saw, so that they were 1″ deeper than the existing treads. This allows for the riser to fit and a 1/2″ overhang, where the cove molding goes. We cut all of our treads and laid them out, then measured the spaces between for the risers to go before cutting our risers down with the table saw, as well.
Most stair nosing hangs 1/2″ over the riser, so in our case we needed a 1/2″ thick piece of wood to drill into the existing riser. Then we nailed the new tread to that. Confused? I sure am after reading that. Look at the picture below, see that empty space behind my riser? You need a 1/2″ thick piece of scrap wood there, to nail everything together.

After the treads and risers were laid out and in place, we nailed them in with our nail gun (oak treads are very hard, so you can’t get them in without a nail gun). Then I cut the cove molding with the mitre saw to fit flush with the underside of the tread. I stained it before nailing it in, so I wouldn’t drip stain all over the risers. The cuts had to be very tight, because we caulked the edges, so if there was too much room it wouldn’t have looked clean.
Once everything was in place and nailed in with the nail gun, we sanded with orbital sander. Everything was pretty smooth already, so I didn’t have to go too crazy.
This is what our’s looked like before caulking, painting, and staining. I actually planned on painting the risers before nailing the cove molding in, but I didn’t tell Jason that, so he nailed it in while he was doing each step. It turned out fine, but if you aren’t a steady painter, I would recommend painting the risers first.
.jpg)
Then I caulked all of the edges, from previous experience-make sure your caulk says it’s paintable.

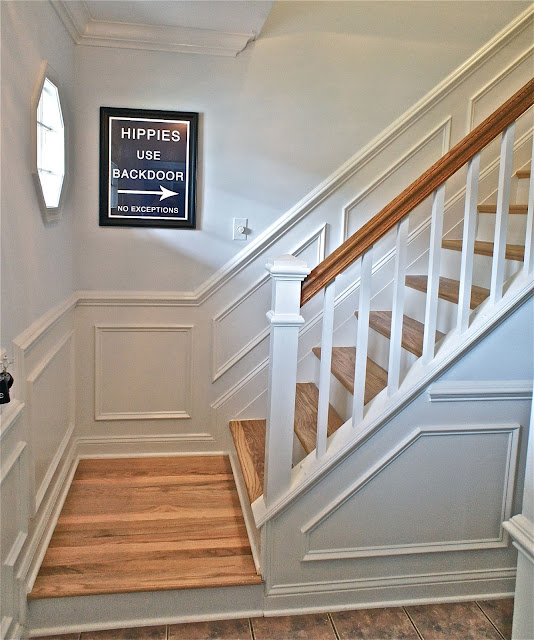
I like the look of painted risers, I think it really brightens up the staircase. I used the same color as my trim, Benjamin Moore Satin Aura in White Dove.
I used Varathane Fast Dry Stain in natural for the stairs, it dries in one hour. I followed the directions by painting it on with a brush, letting it sit for three minutes, then wiping it off. It worked great, I only used one coat to match the floors. After putting dark floors in the upstairs and basement of our last house, I prefer natural floors with the dog and baby-the darker the floors the more scratches and dirt show. Not that I don’t find dark floors beautiful, but I can’t handle the upkeep. We will probably refinish these in a darker stain before we sell this house, but for the next 3-5 years, this color works.

The final step is poly-urethane, I also used Varathane poly. The dry time isn’t quite as fast as the stain, but it’s still pretty good. Be careful not to get any polyurethane on risers that are painted white, it will cause them to yellow. Varathane recommends at least three coats of poly, it didn’t get very glossy. I’ve only done two for now, but I plan on four.
Here’s one final look at the before, followed by our big reveal:
 |
|
|
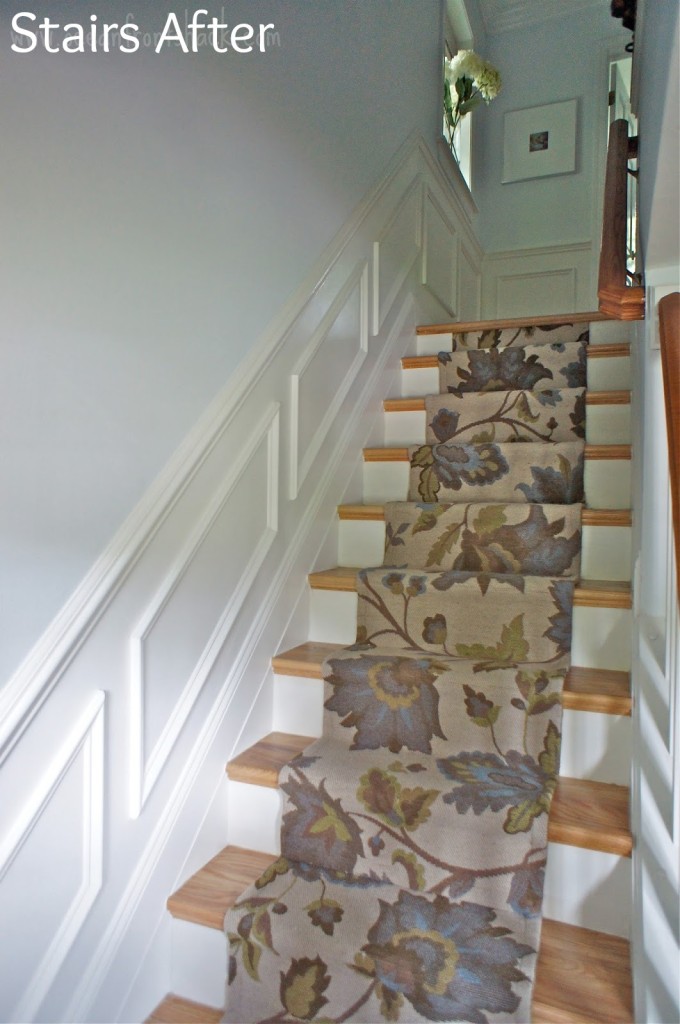
I was pretty impressed with how these turned out. I really expected us to give it a shot, and then hire a contractor to come in after we screwed it up. Jason did an amazing job, they’re very sturdy and don’t creak. I added the runner later to dress things up and cushion any blows for tumbling toddlers. Overall, I think the new stairs are big improvement!