Remember when we had our family photos taken? They finally arrived in the mail last week. We don’t actually have many photos around our house, I feel like it’s kind of strange to stand around staring at pictures of myself. Of course, now I have a kid, so I can go gung ho on the baby pics. The dining room walls were begging for color, and armed with a slew of beautiful pictures by Jamie Horton Photography, I decided that would be the perfect spot for a display. Initially I thought I would do a photo collage wall, but the idea of hanging fifteen pictures straight was less than appealing, so I opted for photo ledges.
I bought white Ribba frames from Ikea, because they’re economical and I wanted a streamlined look. Then I spiced them up a little by cutting wrapping paper with an exacto knife to the size of a few of the mattes.
Materials:
I’m going to list materials for one ledge, so double them if you’re doing two, like us. The materials only cost us $30, Pottery Barn sells a similar Holman Picture Ledge that comes in 2, 3, and 4′ sections (ours are 6′ long), that add up to about $200 with tax and shipping to get the same dimensions. We weren’t intentionally hacking those ledges, but I came across them after we finished and realized ours are identical.
1. Six foot section 1 x 2″ premium pine lumber
2. Six foot section 1 x 3″ premium pine lumber (x 2)
3. Nail Gun w 1″ finish nails
4. Clamps
5. Loc-Tite molding and trim adhesive
6. Stain (I used Varathane Premium Fast Dry Stain in Sun Bleached)
7. Face Mask
8. Rags
9. Rubber Gloves
My first step was staining the wood with Varathane fast drying stain in Sun Bleached. I like to stain using rags, rather than a brush. These could also be painted, but I wanted a little grain to show through. After three coats I had the coverage I was going for and we let them dry overnight.
The next day we laid out our wood, and ran a bead of Loc-Tite along the edge of a 1 x 3:
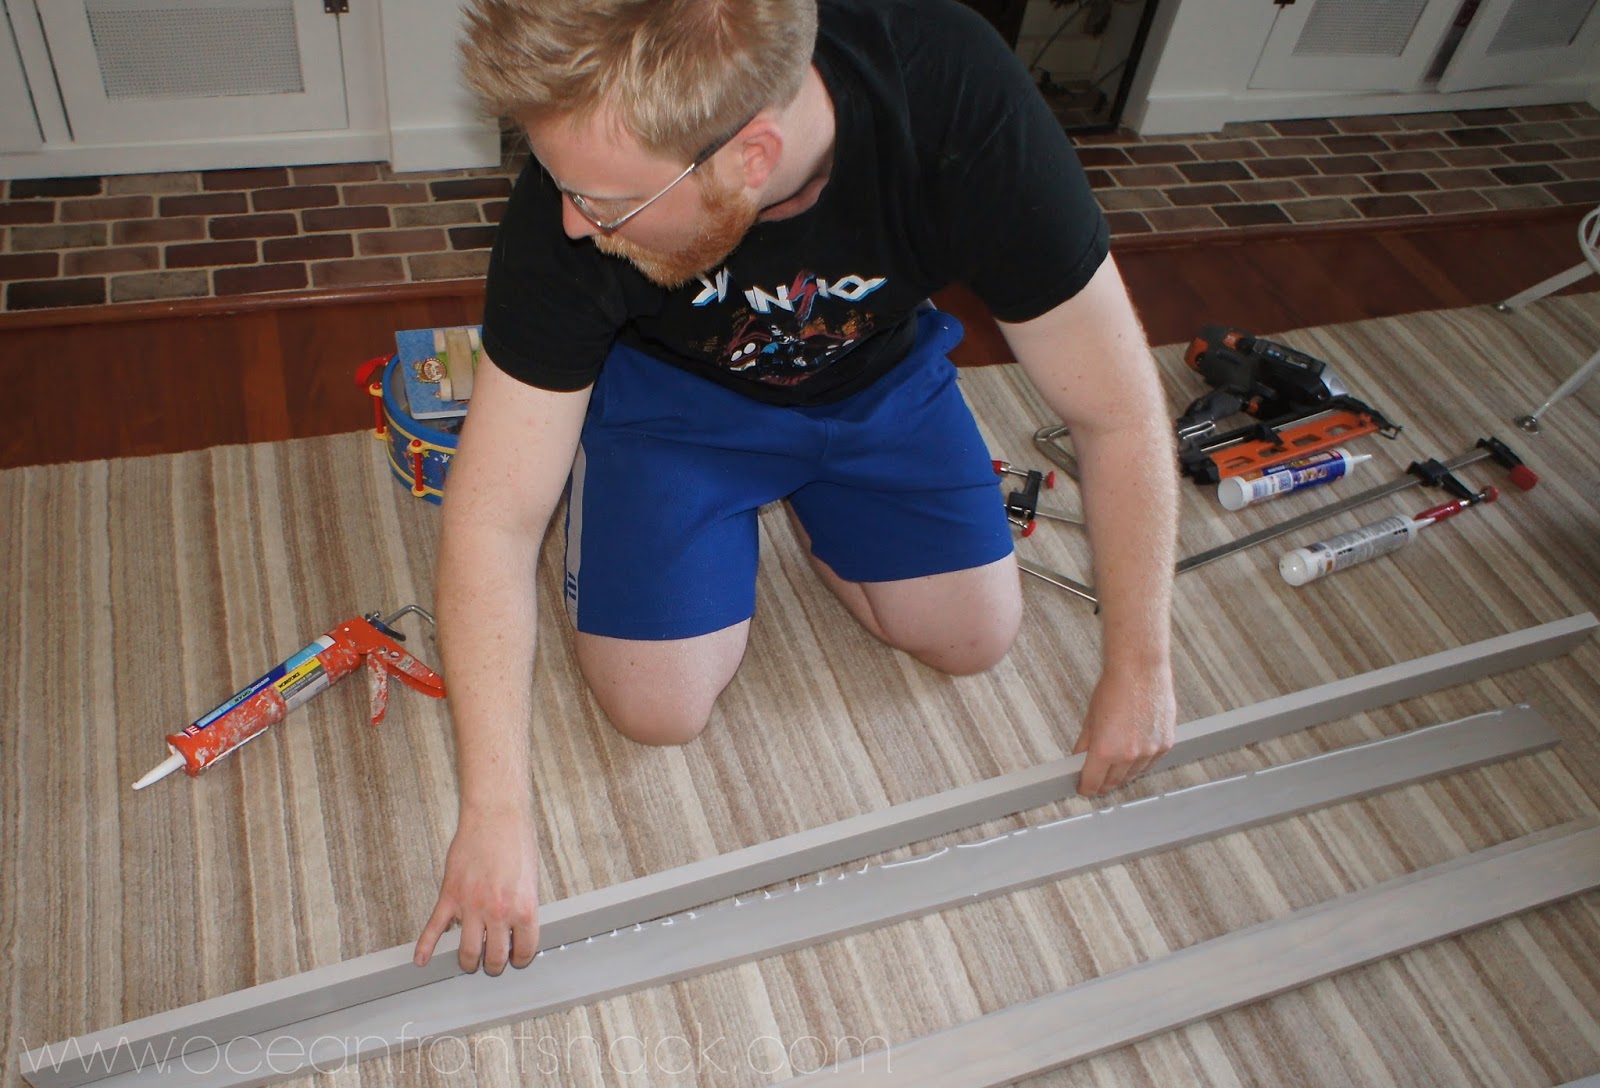
Then we clamped the two pieces of wood together to hold them perpendicular before nailing.

I’m sure you could use a hammer and nail for this to attach the wood, but we have a nail gun, so that’s what we went with (if you do a lot of DIY projects, life got a whole lot easier for us after that purchase). This is the side that goes against the wall, so we didn’t really worry about nail holes.

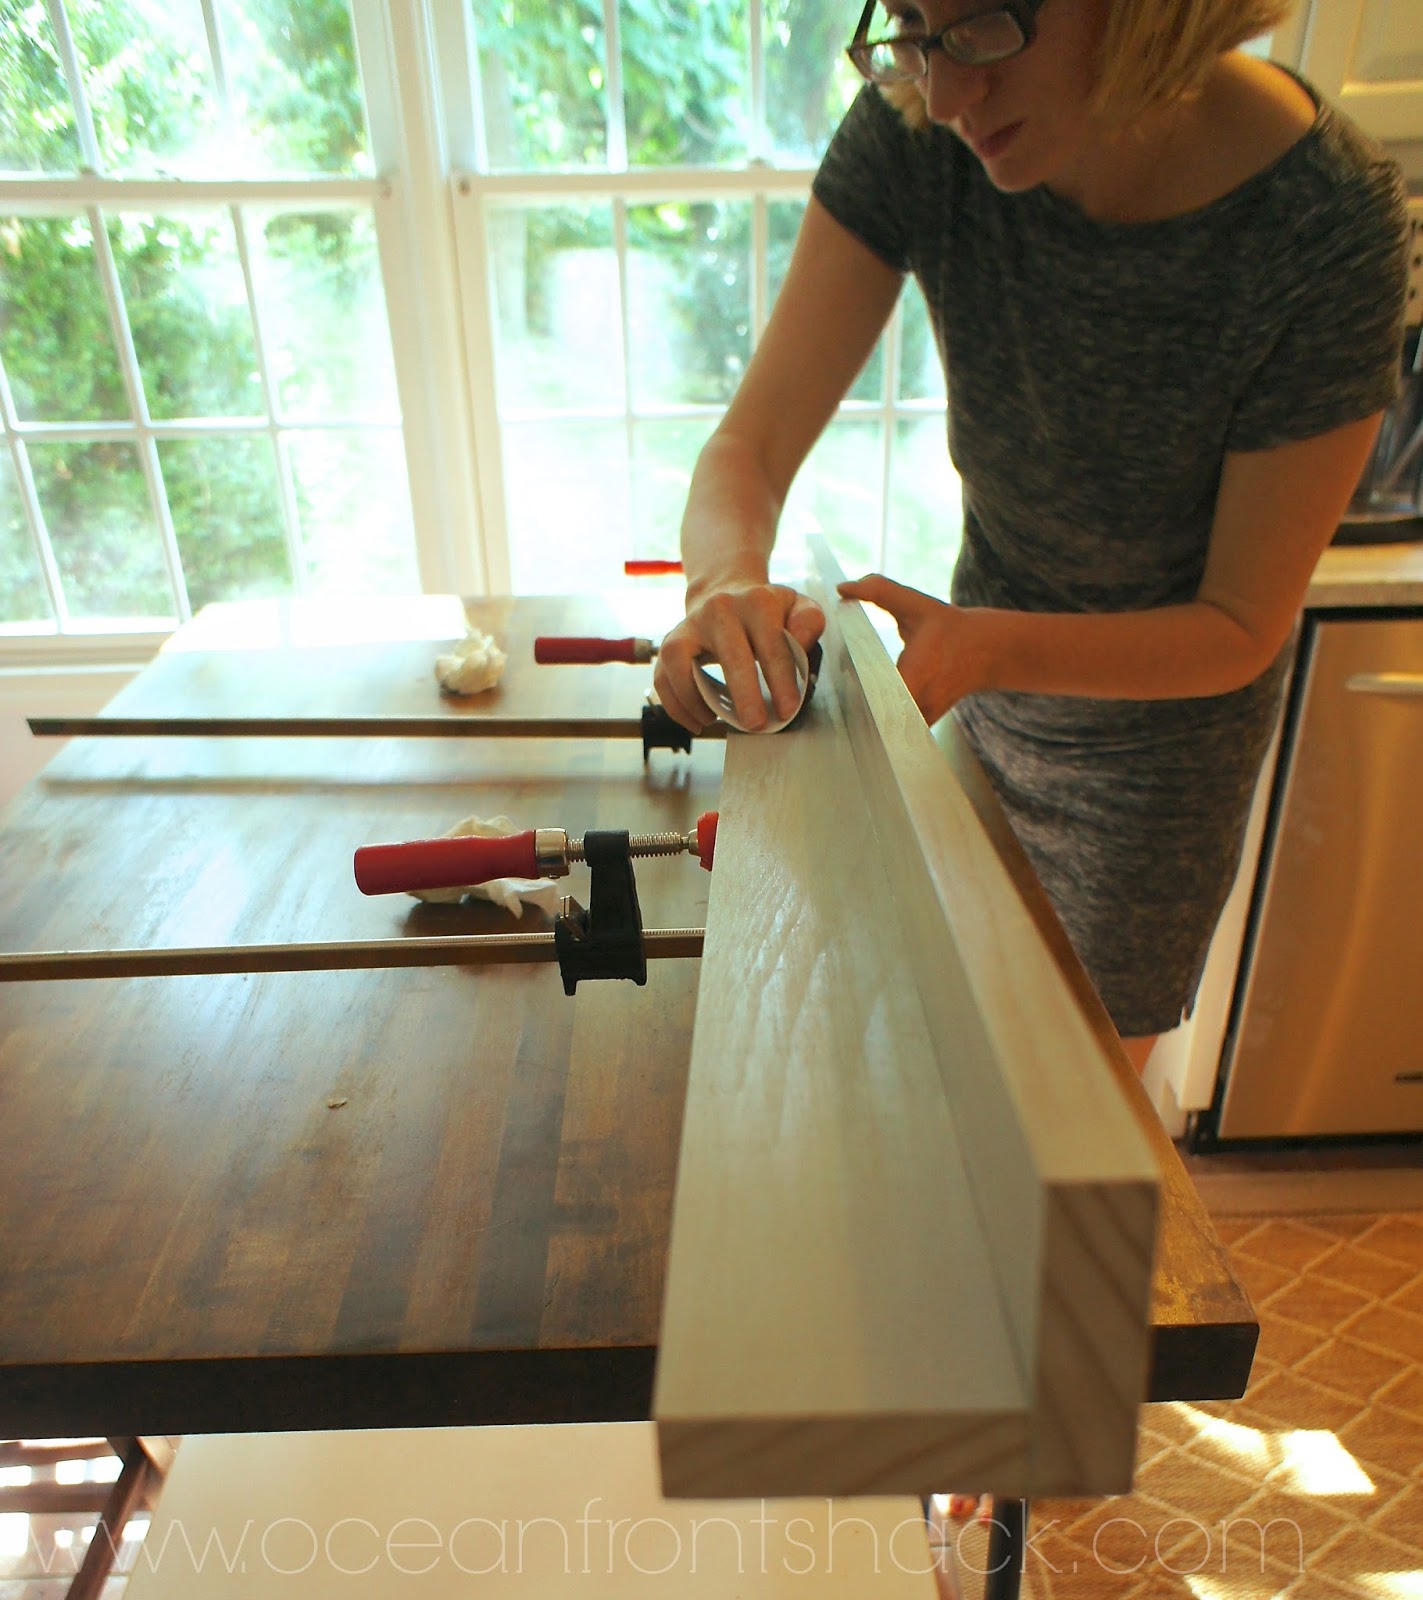
I wiped the excess glue that came pouring out of the seam after the wood was clamped with a wet paper towel:


This is the new view into our dining room:

Voila! I love it, and I can easily move the frames around or change out photos when we take new ones, it’s the lazy man’s photo collage wall. As you can see, the site is back in business, although I may be slow on blog posts for another week because it takes an eternity to edit photos on my laptop. Hopefully our desktop is back from the Mac Hospital, soon!
In other news, we had our second sonogram today, Baby T-Rex (we let Grant name him/her in utero) is right on track and should be making an appearance in March, so we’re getting ourselves in gear on the hardwood floors upstairs. We have a toddler moving to a big boy room and a new nursery to start decorating, so things should be busy as ever around here. Anyone else have any Labor Day projects to share?