Click here for Part II, Grouting.
Our flooring situation after we swapped the 30” deep built ins with our new, home-made 8” ones, was daunting, to say the least. The best solution we could come up with was to use tile to create the look of a hearth spanning the room. This was the most expensive part of our project because we needed something specific, narrowing our option field to pretty much one item. I wanted a 3 x 6 clay in multiple shades of red and brown that had the appearance of brick, and the only thing that fit the bill was $17 a square foot. At one point I lost my mind and started researching DIY tile making, but when I mused, “Where can we find a kiln?” my husband was wise enough to veto me and turn to the professionals.
Materials
- Hardy-backer (as a base for the tile)
- Oscillating Multi-tool (jigsaw, circular saw, etc. will fit the bill, too-this is for cutting your hardy-backer)
- Tile
- Tile thinset
- Trowel
- Tile Spacers
- Wet-saw (I highly recommend renting one from Home Depot)
We started out by measuring the space where our tile would go and cutting the hardy-backer to fit. Hardy-backer is heavy stuff, it’s made with cement. There are some new lightweight and more portable options, I haven’t used any of them, but it’s worth looking into. We cut the hardy-backer with our oscillating multi-tool. You will have to have one of these if you need to cut down a door frame when you’re tiling. They’re really loud, but smaller and more portable than a circular saw.
Then we drilled the hardybacker into the subfloor.
Once we had it in place I laid my tiles out to make sure I liked the pattern. I didn’t lay it all the way out, and should have, because I had to edit my design after everything was finished. It wasn’t a problem, though.
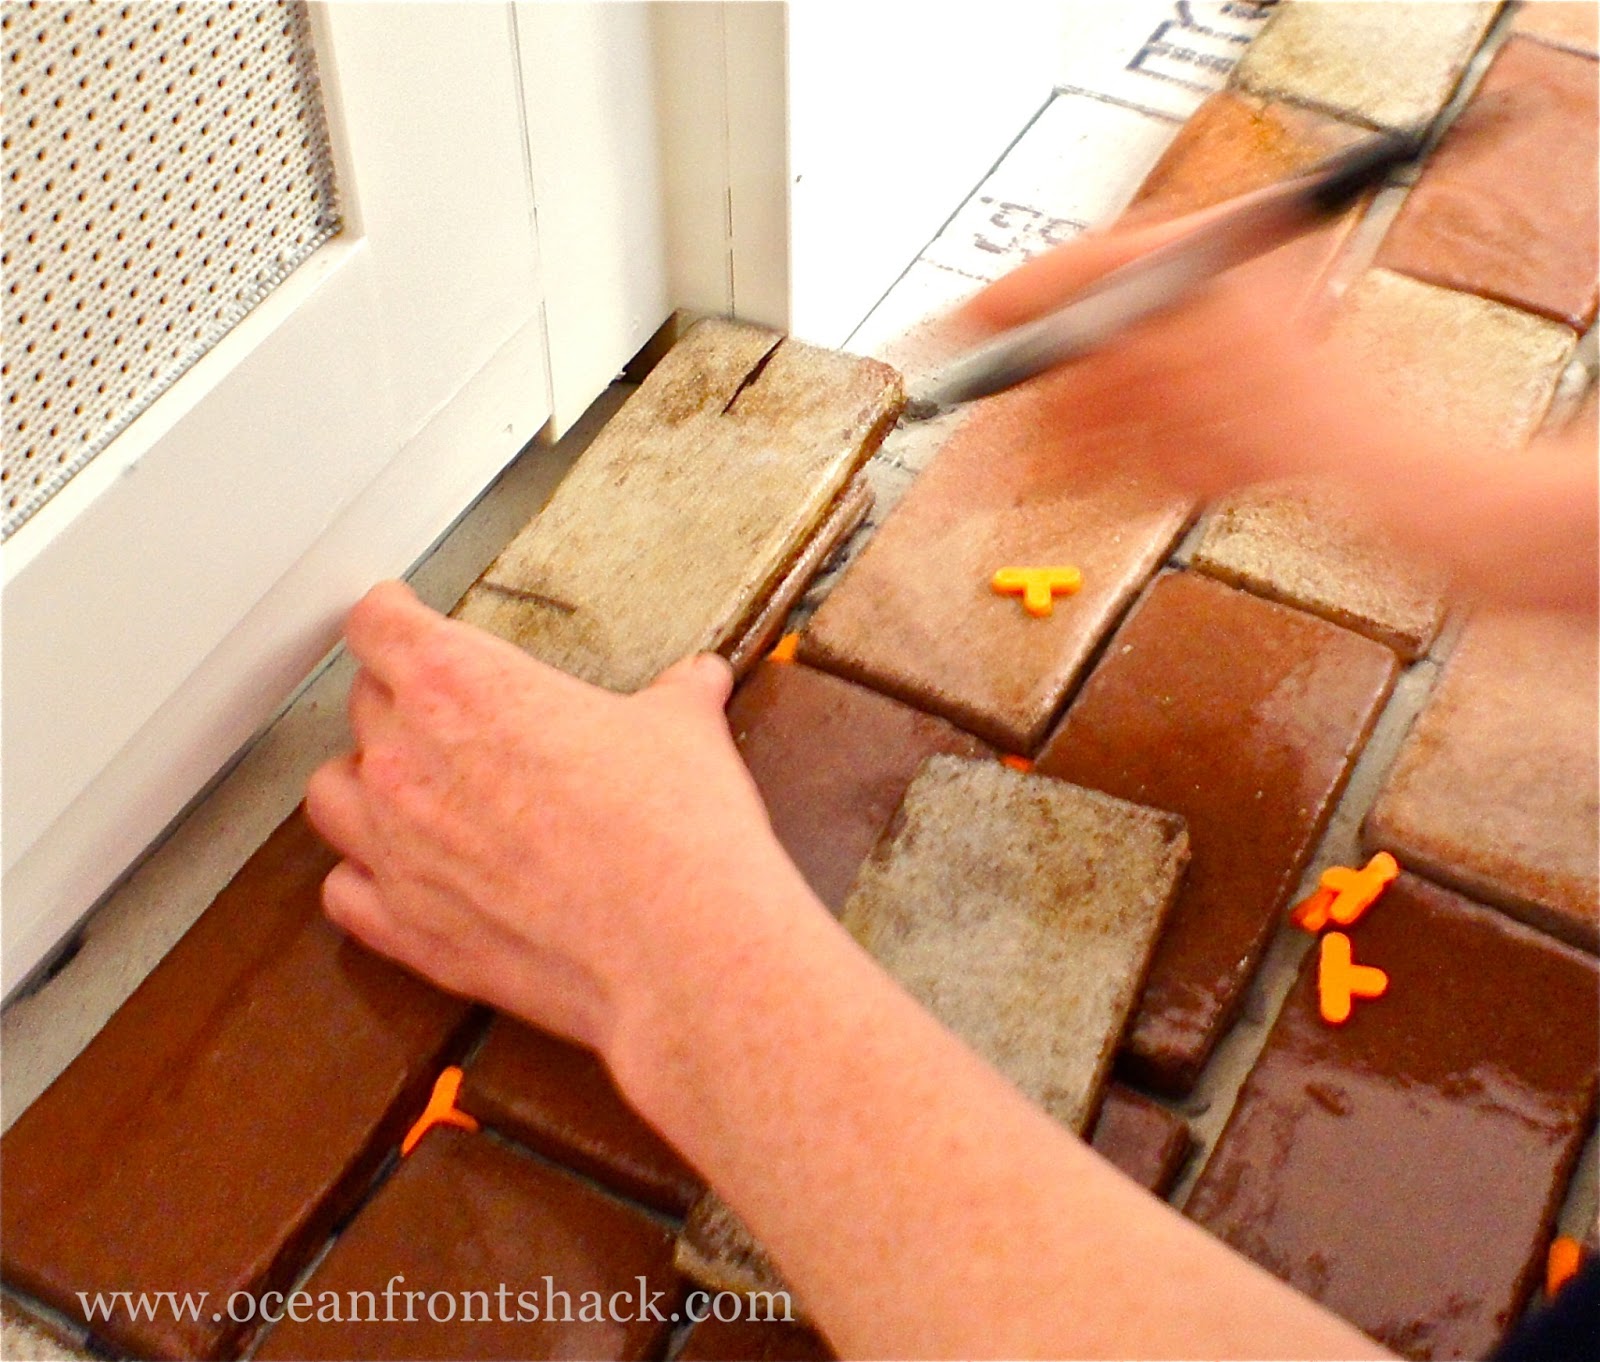
I like to install all of my whole pieces and do my cuts at the end. I start by laying a softball sized glob of pre-mixed thin-set on the hardy-backer. Then, I spread it out 1/4” thick using the flat side of a notched trowel. Once I have a 2’ square section, I flip over to the sawtooth side of the notched trowel and drag it through my thin-set, creating a pattern of horizontal lines. As my brilliant husband explained to me, the notches create a vacuum effect that suck the tile to the floor so it adheres properly.
Then I lay out the tiles in the pattern I’ve chosen. We did a staggered brick pattern, using 1/4” T-spacers. One quarter inch is about as thick a grout line as you can do, which we needed to get the look of brick mortar.
After my tiles were laid I decided it looked a little too “patterny”:
I used a paddle bit (not the best tool for the job, but it was laying on the floor next to me) to pull a few tiles up and rearrange them. As long as it’s still wet this can be done. I added more thinset on the back sides of the tiles I was moving before I laid them back down.
For the fireplace itself I bought SimpleMat, a tile setting mat I’ve used before unsuccessfully. I wanted to give it another try on fresh hardybacker, just to make sure my previous experience with this product wasn’t due to improper preparation. It wasn’t, this stuff stinks. I followed the directions to a T, and five minutes after each tile was placed they started clinking to the floor.
I just put thin-set on the back of the tiles and put them back on the wall. On backsplashes I like to apply the thin-set to my tiles rather than the surface, I’ve never had a problem doing it this way (I wouldn’t recommend it for a surface anyone is walking on, though), and I find it easier.
For my cut tiles along the edges, I like to lay them out and draw lines on the front of the tile. If you draw lines on the back of the tile they have to be the reverse of what you’re cutting, so I always mess it up. I place the tiles where they will be laid to get my measurements precise, rather than using measuring tape.
Then I number each tile with a coordinating number to the space it will be laid, so after they’re cut I know where everything goes.
Jason cuts the tiles on a wet-saw we rent from Home Depot. We used to have a wet-saw, but the edges of our cut tiles were always a little rough. We don’t tile too often, so a really expensive tile saw isn’t something we need. A high end saw from Home Depot rents for $42, the blade itself would have cost $30. Once all of our tiles are marked we only need the wet-saw for about thirty minutes.
I apply mortar to the back of my cut tiles with a trowel and adhere them to the floor. Flooring should not be installed by putting mortar on the tiles themselves, it will cause your tiles to crack when weight is put on them, it should always be done by using the notched trowel on the floor. The edges of your room aren’t high traffic, though, so I’ve never had any problems doing it this way just on those pieces.
After everything sets for 24 hours, we can start grouting.
Tags : DIY, grouting, tiling